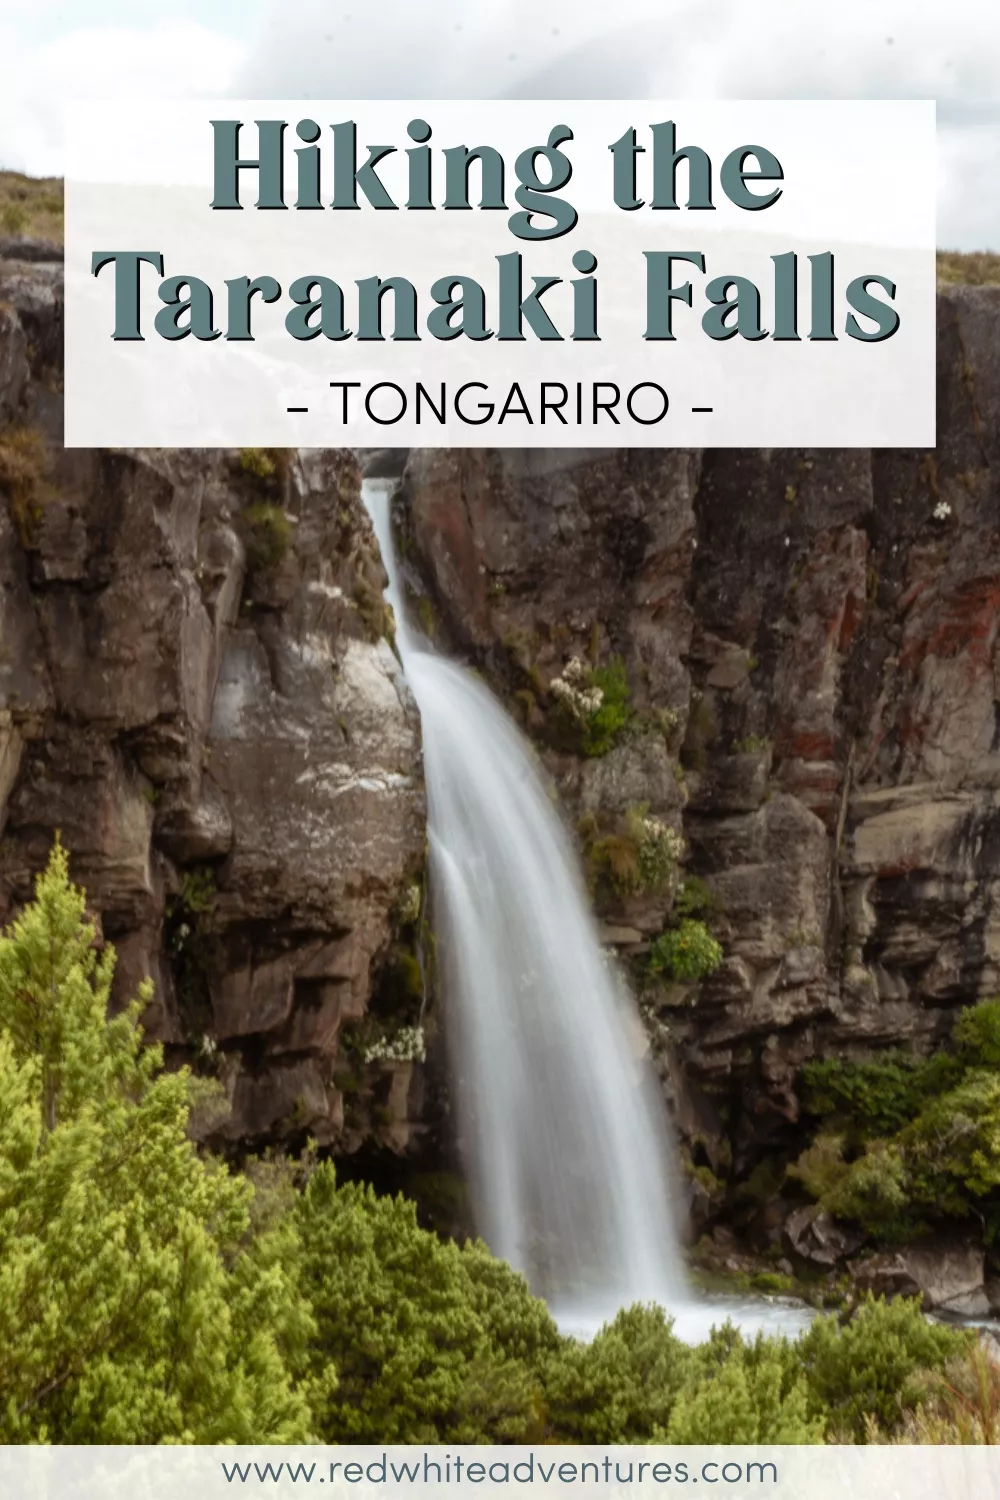
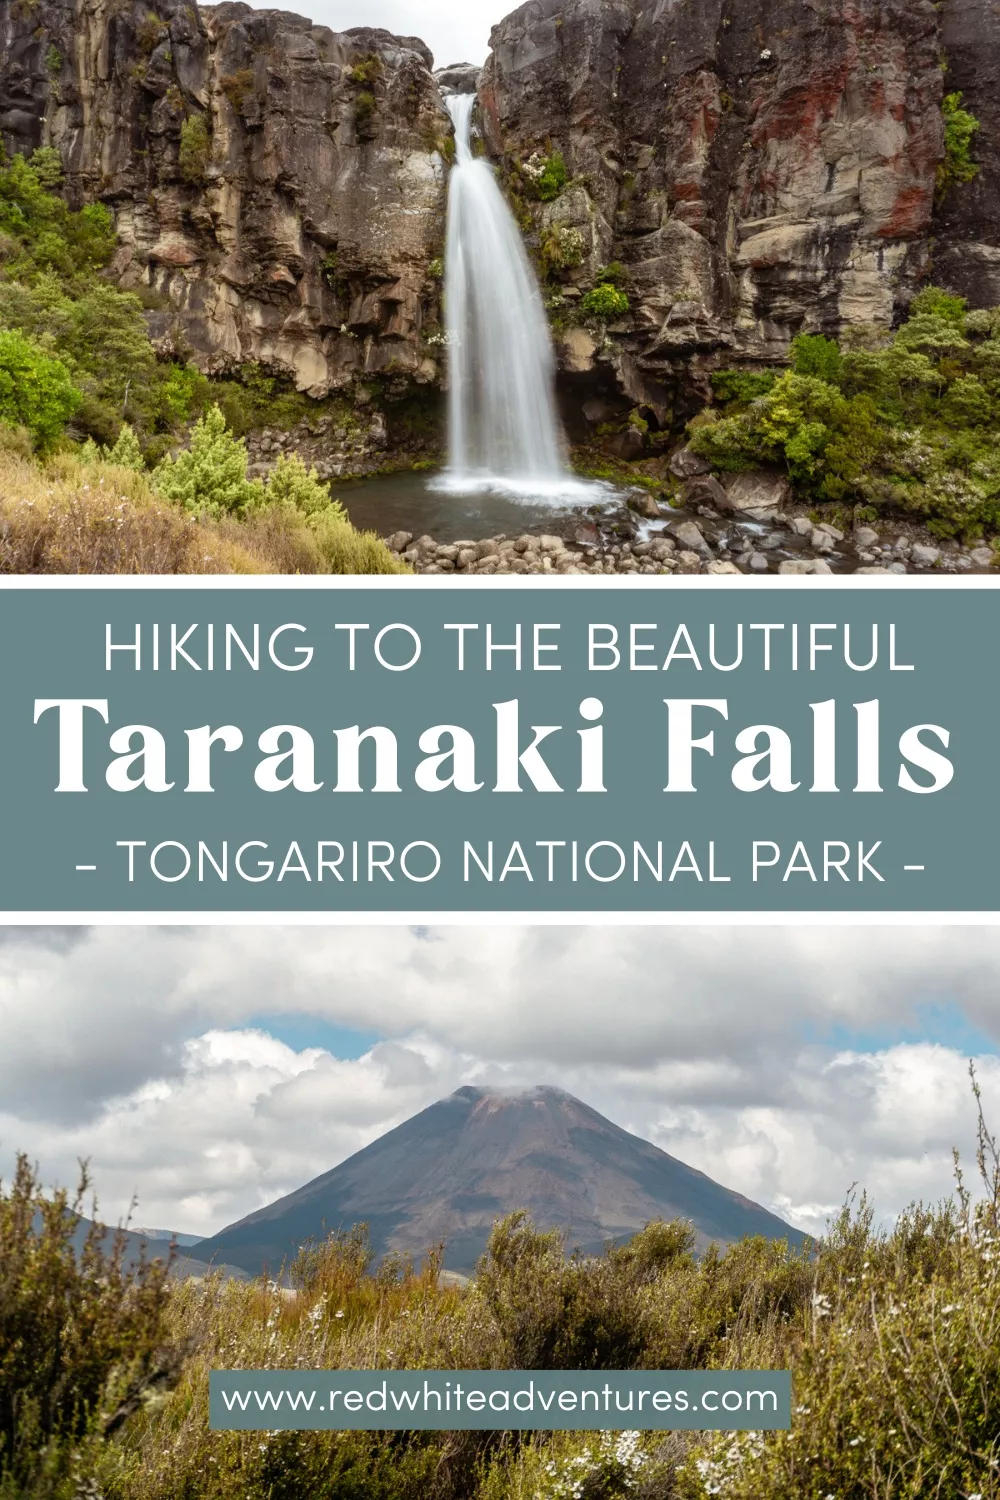
Hiking to the Beautiful Taranaki Falls – Tongariro National Park
Taranaki Falls is a beautiful 20-meter-tall waterfall located in the Tongariro National Park. If you’re planning to spend some time in the national park or Whakapapa Village then this sweet 6 km walk is the perfect trek to see one of the most beautiful waterfalls in the park.
What’s fun about this trail is that you actually get to do the very first bit and the very last bit of the Northern Tongariro Circuit (not to be mistaken for the Tongariro Crossing) which is a multi-day hike around Mount Tongariro and Mt Ngauruhoe.
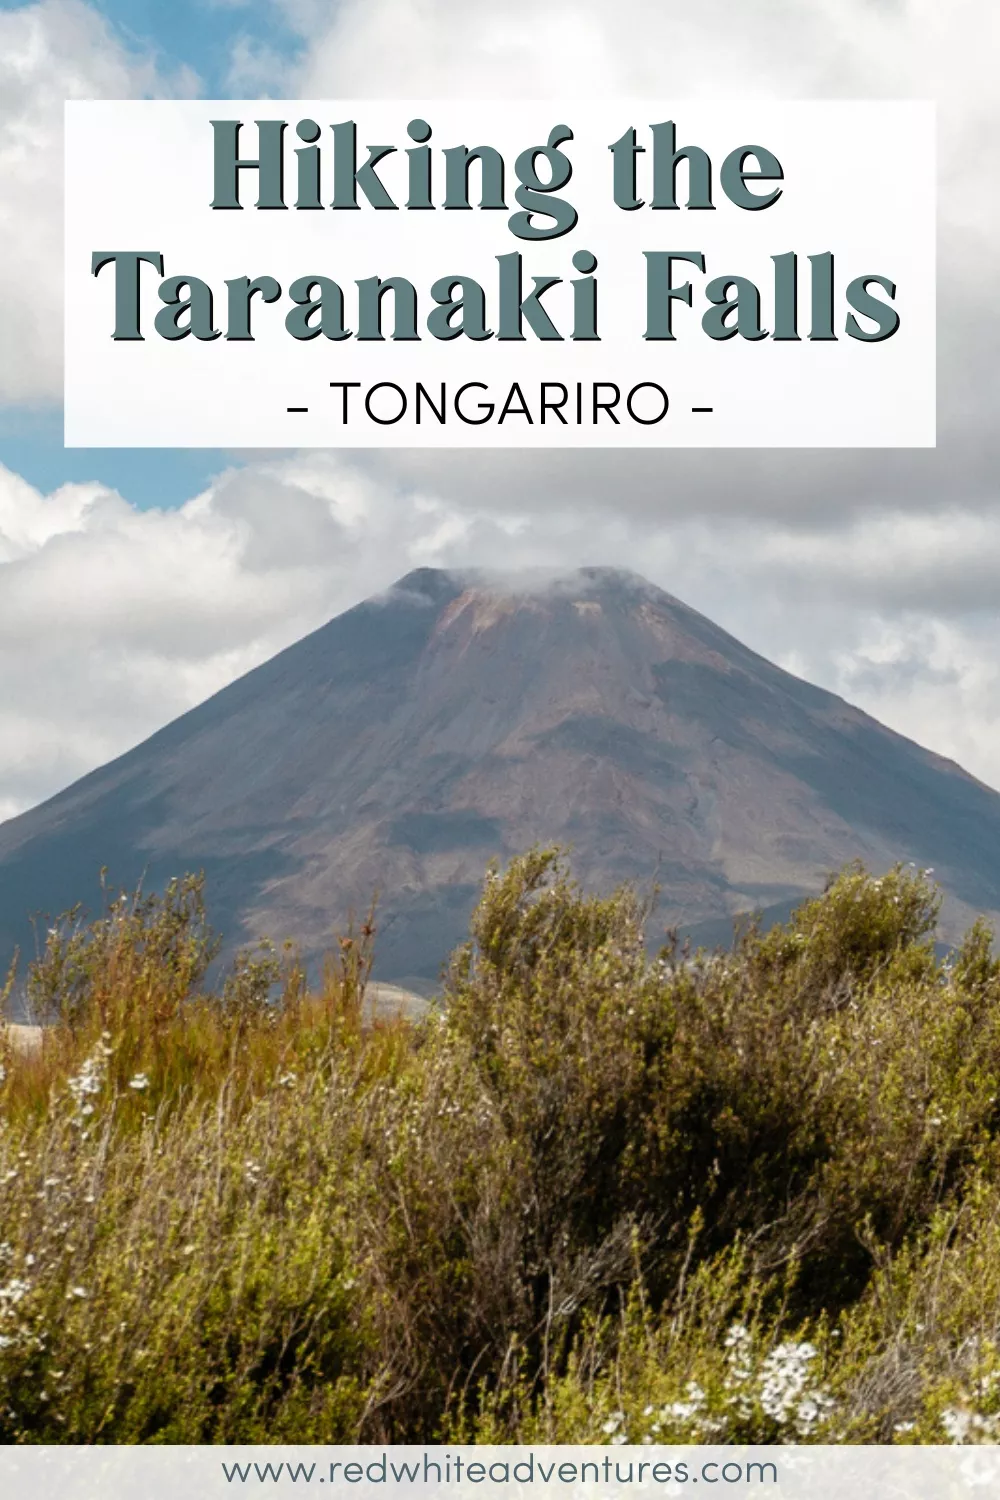
On a good clear day, you’ll get awesome views of Mt Ngauruhoe, Mount Ruapehu, and the other peaks in the area. So even though it’s a short hike, you really get a good taste of Tongariro National Park and get to see an awesome waterfall.
Disclaimer: This post contains affiliate links which means if you decide to use the links and make a valid purchase, we will receive a small commission at no additional cost to you. Thank you for your support!
Everything you need to know about the Taranaki Falls hike
The most important thing to know so there’s no mistaking hikes is that Taranaki Falls is in Tongariro National Park – not next to Mount Taranaki… confusing, we know. But there’s a story behind it!
According to Maori Legends, Mount Taranaki used to stand tall inside the Tongariro National Park but there was a dispute with some of the other male mountains over the female mountain, Pīhanga, who all wanted her love.
Taranaki ended up losing the battle and moved his way to where he stands today near New Plymouth. On the way, he carved out the bed for the Whanganui River.
You can read more about the legend here.
If you’re planning to go to Whakapapa Village and spend some time there this hike is perfect since it starts right next to the visitor centre in Whakapapa Village.
It’s a relatively flat hike that takes you through some pretty epic terrain. The trail is quite well maintained but there are times when there has been lots of rain where the trail can get quite messy – so it’s good to come with the right footwear, etc.
We recommend doing the trail as a (clockwise) loop so you can have some different views but it can also be done as an in-and-out trail if you want to get to Taranaki Falls as quickly as possible.
There are quite a few short trails in the area like Tawhai Falls (Gollum’s Pool), this one, and a side track to Tama Lakes. So there’s lots to explore while you’re in Whakapapa other than the world-famous Tongariro Crossing.
Practical information about the Taranaki Falls walk
Distance: 6 km return / 3.7 miles return
Elevation: 145 m / 475 ft. elevation gain
Type: Loop trail (can also be done as an in-and-out trail)
Length: The average time to complete is 1.5 hours
Difficulty: Moderate (pretty nice surface for most of the hike)
Rating: 4 out of 5 stars
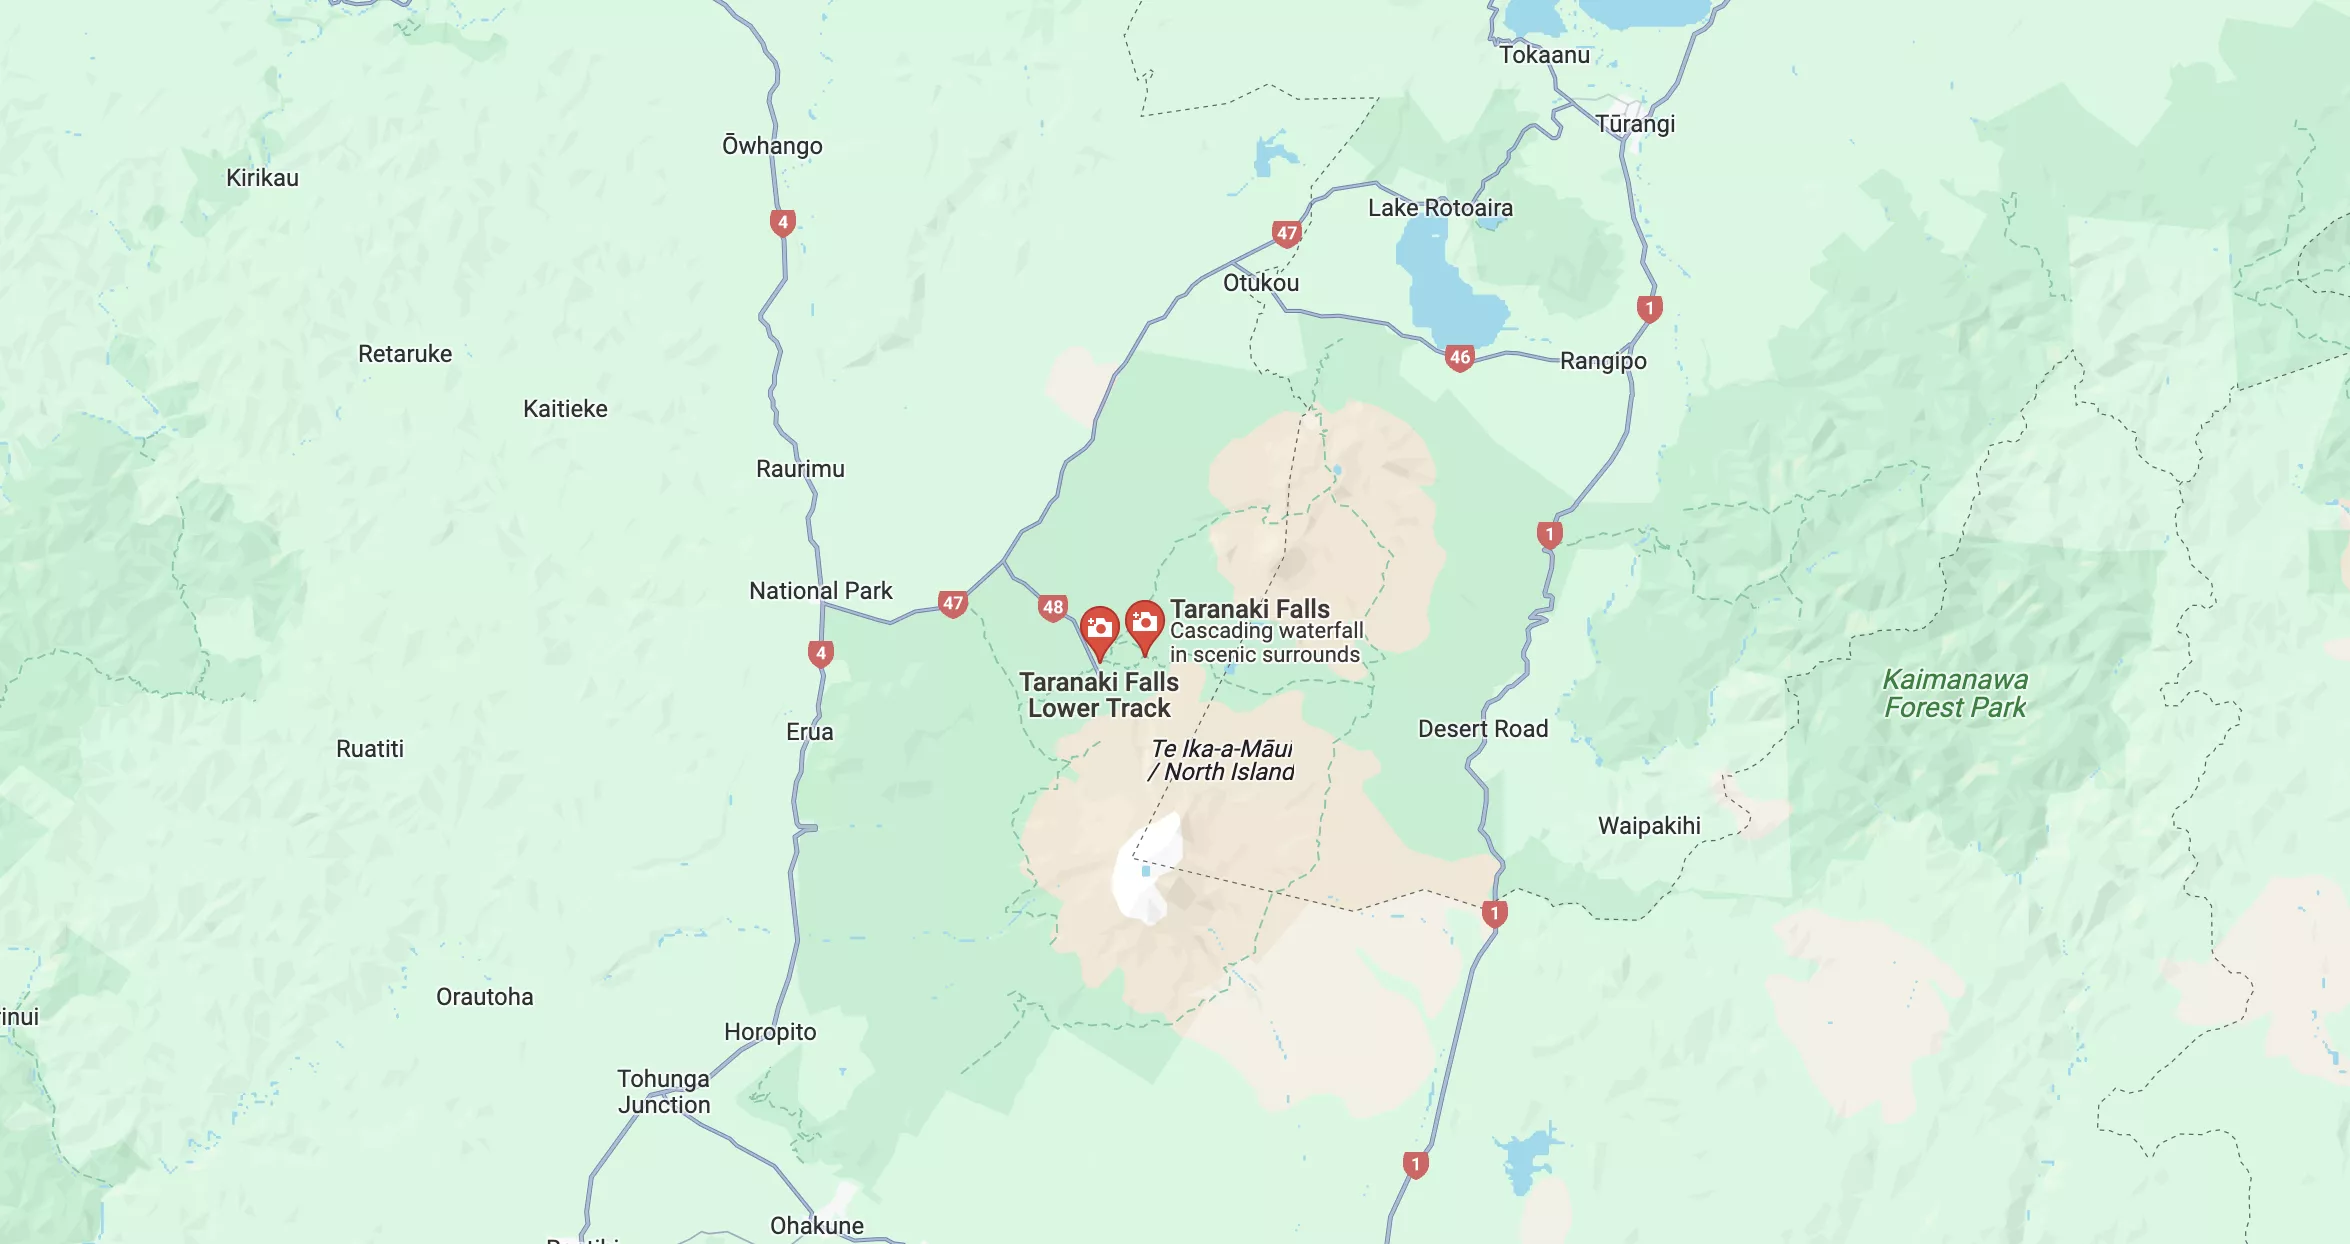
Click here to see a trail map for the Taranaki Falls Walk
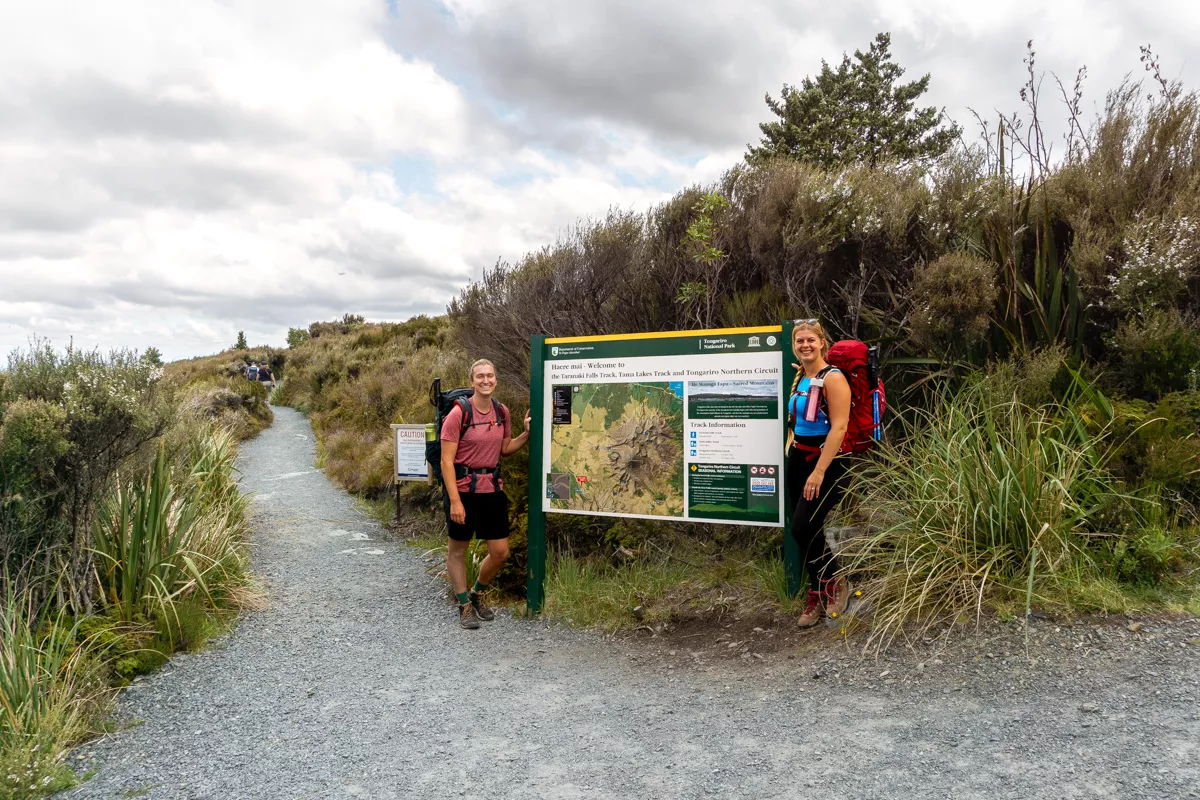
Here’s a picture of the beginning of the Taranaki Falls Walk
Hiking Tip: Look up the trail on AllTrails before starting your hike 🗺️. You can find important trail information, such as recent wildlife sightings and trail closures. Check out the free version here or get a 7-day free trial of AllTrails+ here.
Starting the hike in Whakapapa Village
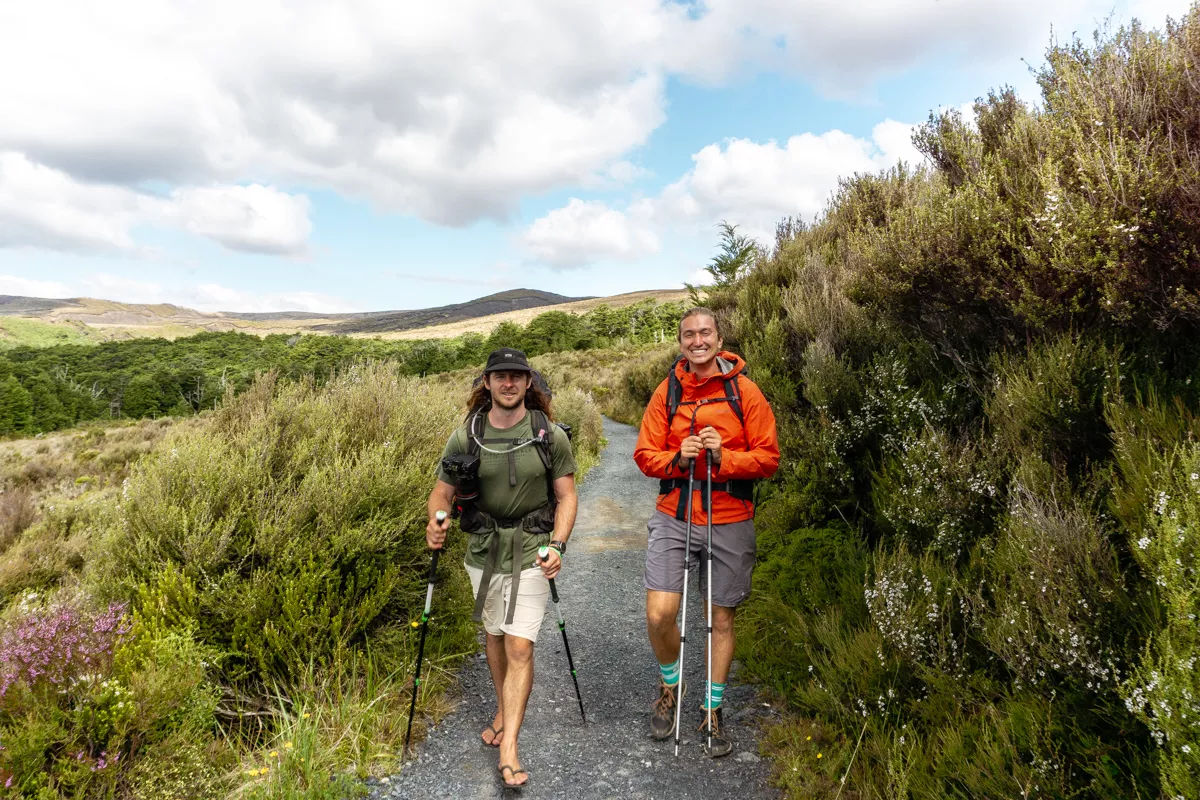
This starting point in Whakapapa village is quite iconic because it’s the beginning of the Northern Tongariro Circuit as well. If you see some people with big backpacks looking like they’re camping overnight somewhere you’ll know why.
There’s tons of parking relatively close to the trailhead on the main road going into Whakapapa Village. You can leave your car there for the few hours you’re on the walk.
Lots of people leave their cars & vans for 3-4 nights while they’re on the Tongariro Circuit so it’s a relatively safe place to park. If you are parking there for multiple days, you’ll need to get a parking permit from the Visitor Centre.
To start the hike, you’ll walk on the road past the Chateau Tongariro Hotel and then turn in by the Visitor Centre past the Skotel (which is a great place to stop for food after) and then you will finally hit the trailhead.
The trailhead will be quite obvious as there will be a big sign with maps (see the picture above) showing information about the Tongariro National Park.
📍 Want to know about all the best spots in Aotearoa New Zealand?
Then check out our New Zealand Maps with +200 locations around the country that we have visited during our 10 months of living and travelling in NZ! 🗺️
Clockwise from the Tongariro trailhead
We mentioned there are a few ways you can hike/walk to Taranaki Falls. You can do it as an in-and-out trail or as a loop trail. In this post, we cover what it’s like hiking to Taranaki Falls as a loop trail going clockwise.
We personally found this the best way to do the hike which is why we recommend you do it this way as well.
This way you get a taste of the very beginning and the very end of the Northern Tongariro Circuit – and in the middle, you’ll get to see the falls you came for.
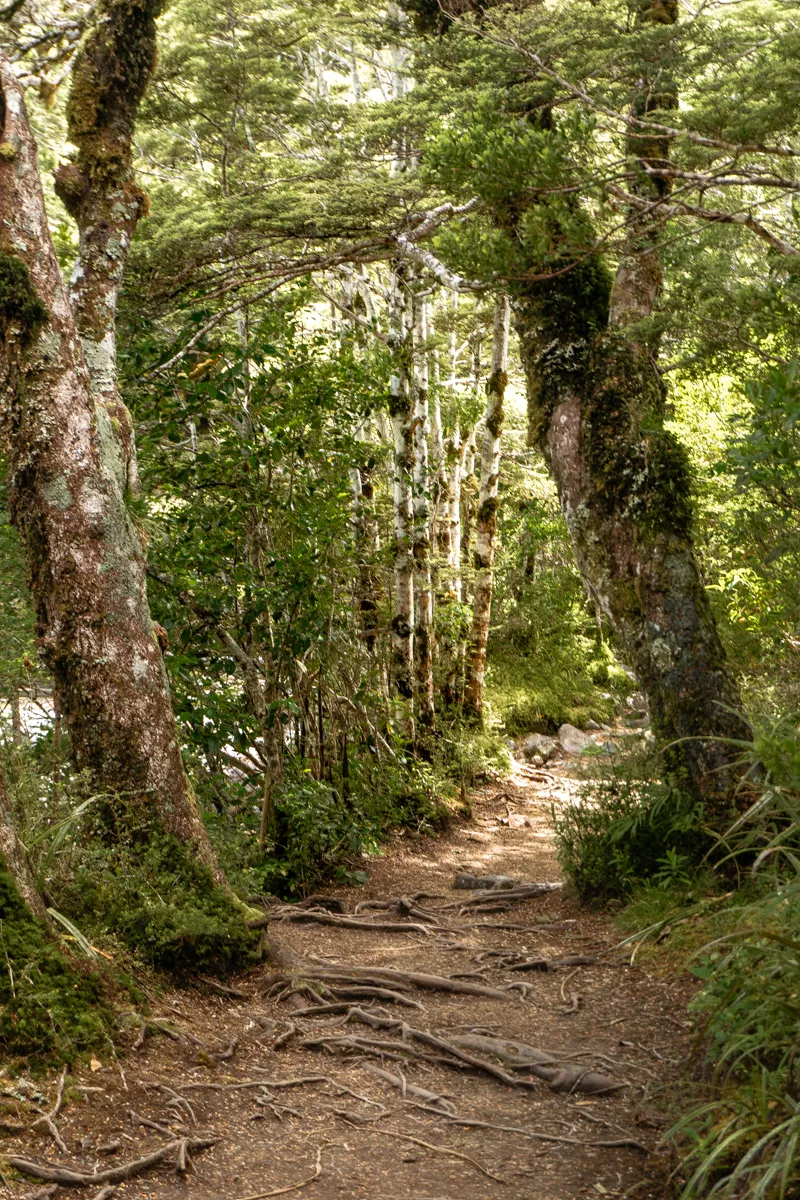
As you start clockwise on the trail you’ll notice it’s quite well maintained and there’s even going to be stretches that used to be an old horse track making the trail very easy to walk on.

Because of erosion over the years, there are sections of the track that have turned into these kinds of gullies because of all the wind and rain. Especially if it’s rained in recent days before you hike you’ll notice some very muddy and wet sections on the trail.
We recommend wearing proper shoes and bringing hiking poles if you have them. We’ve outlined a packing list in the “What to bring” section further down the post.
Thankfully this section of the hike is part of one of New Zealand’s Great Walks which means it’s still maintained by DOC (Department of Conservation). On all of the Great Walks in New Zealand, they maintain the trails really well making them easy to walk on.
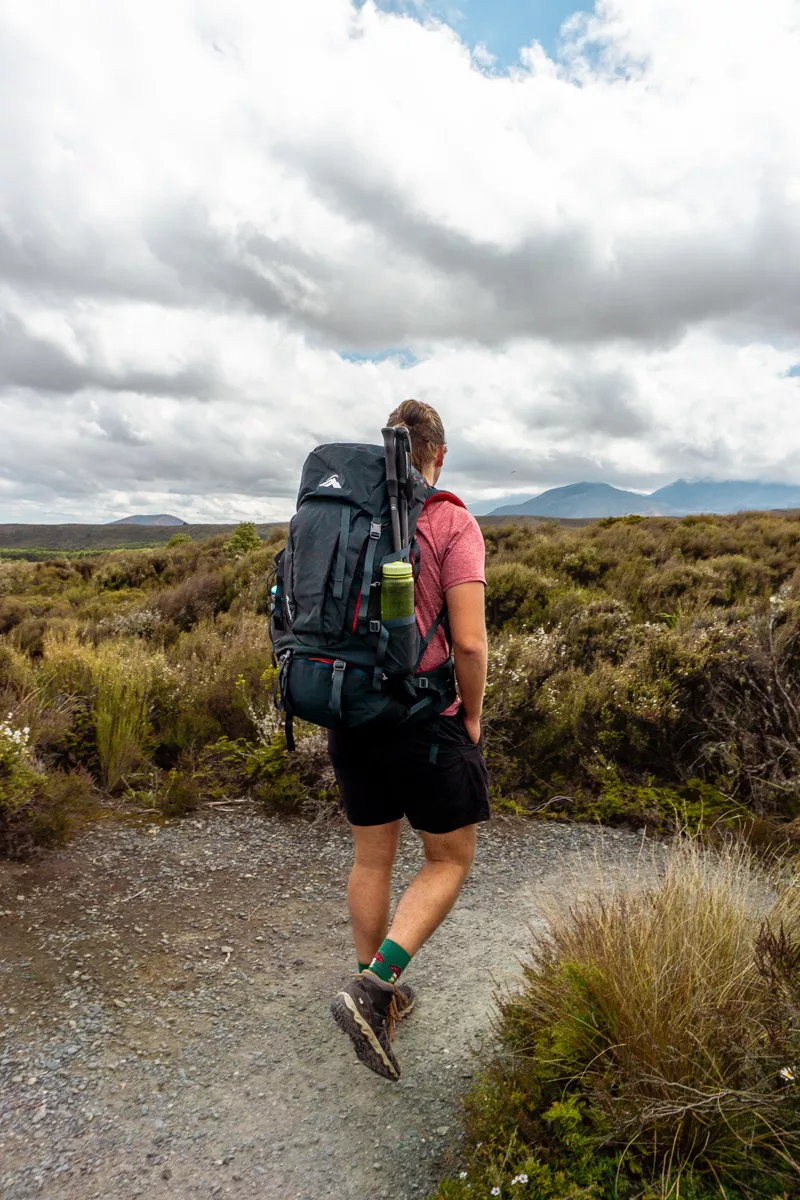
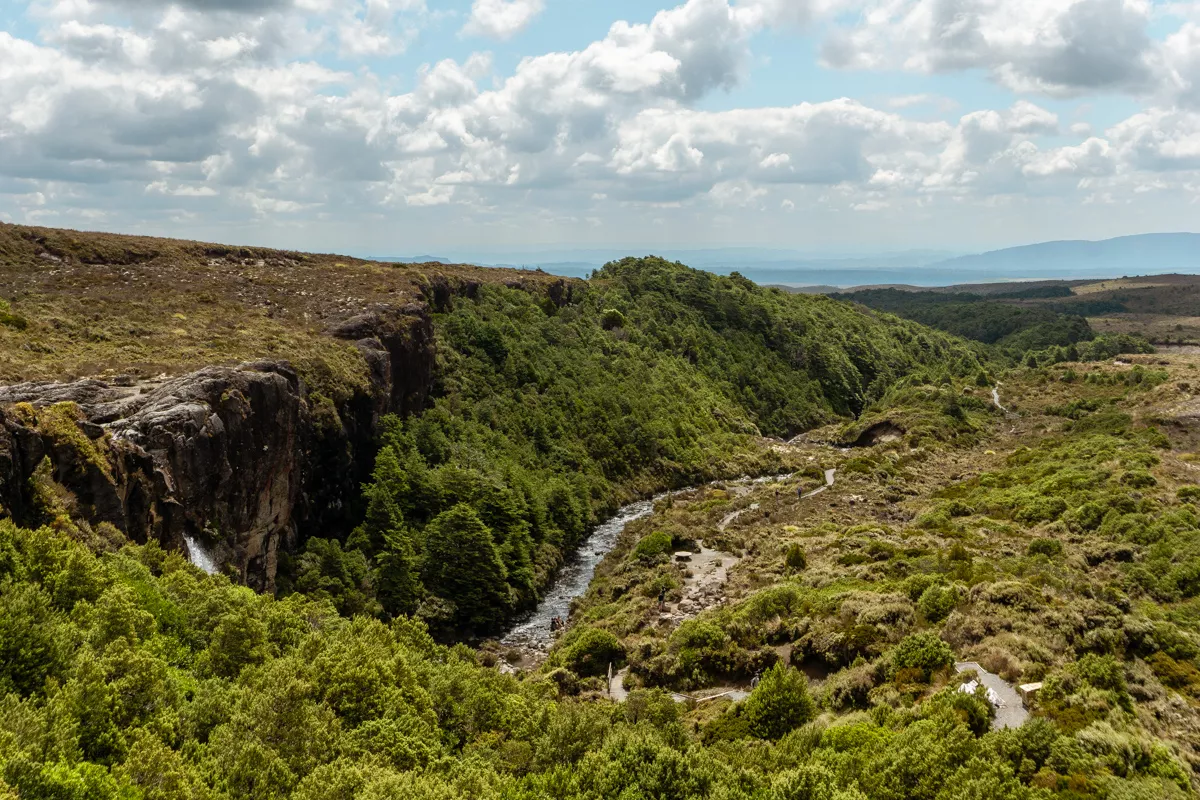
Tongariro is such a cool area to hike because the terrain is completely different and so unlike anywhere else we’ve ever hiked (and we’ve hiked a lot)!
Tongariro National Park is active volcanic land and you can clearly see that when you take a look at the landscape!
Continue clockwise towards the falls
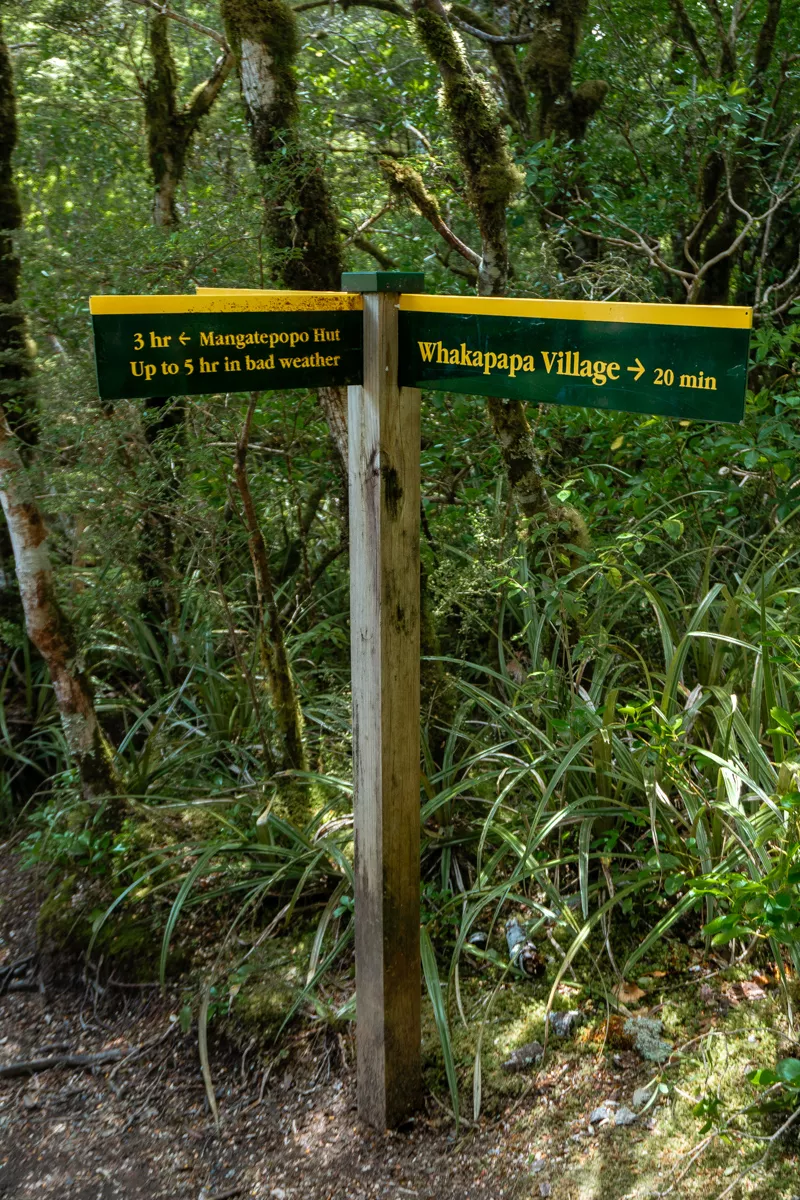
There is really only one spot where you can truly take a wrong turn and end up going towards Mangatepopo Hut instead of Taranaki Falls.
There will be a fork in the road just after 1 km where going left (across the bridge) will take you towards Mangatepopo Hut (part of the Tongariro Circuit). Going straight/right will take you towards Taranaki Falls.
At this fork, continue straight. Do not cross the bridge.
This bit of the loop trail is probably the least bit walked on since its only use is for doing the Taranaki Falls Loop walk but it’s still easy to find the trail and where to go.
This section is mostly red tussock from the volcano explosions that happened thousands of years ago.
You’ll notice as you get closer to the waterfall that the sound of the flowing water will get louder and soon enough, you’ll see the beautiful falls.
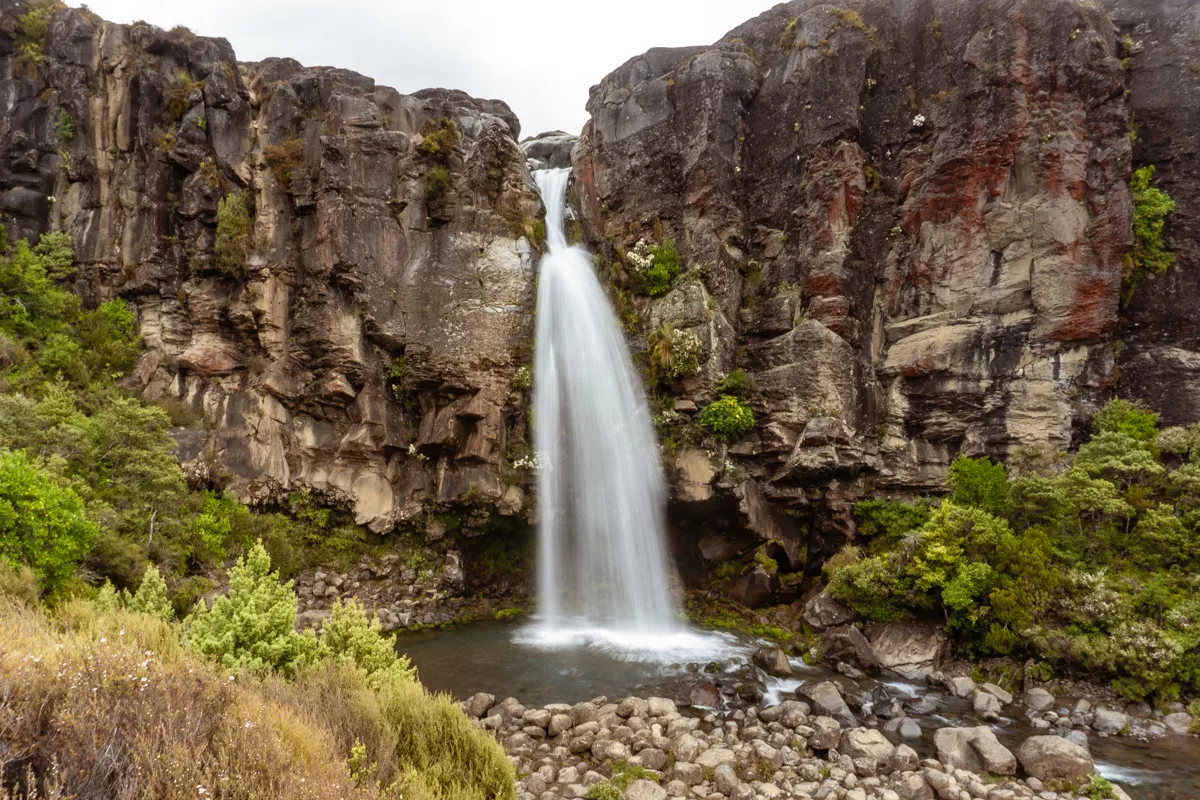
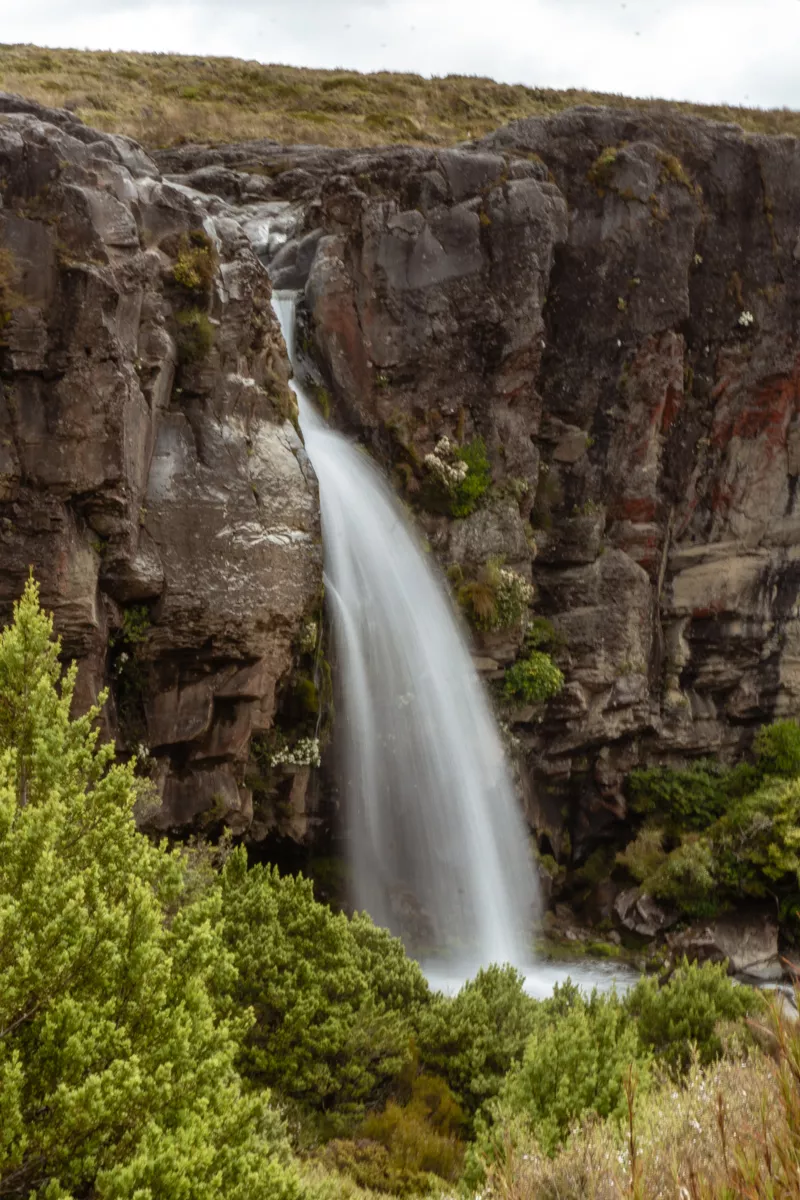
Take in the view of Taranaki Falls
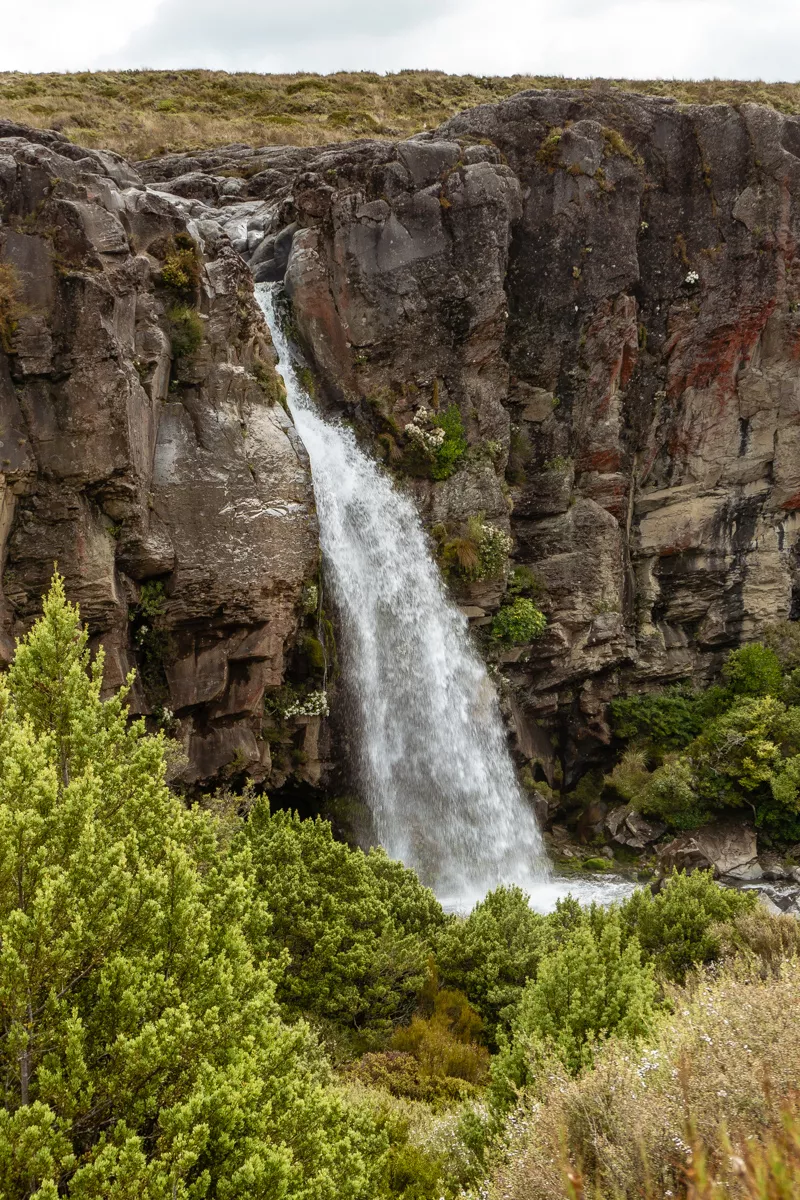
Next thing you know you’ll be at the iconic Taranaki Falls. The falls are after exactly 3 kilometres!
At the falls, you may bump into some other people coming from the other way around or some of the people who are finishing up the Northern Tongariro Circuit and making one last stop to see this waterfall.
At times I feel like we get so spoiled hiking and exploring around New Zealand since every turn and corner just has something beautiful to offer.
The Tongariro National Park is a prime example of that. You hike this 6 km loop trail and you get to see a beauty like Taranaki Falls.
A fun fact about this waterfall is that it drops about 20 meters and the water flows over volcanic rock which erupted from Mount Ruapehu over 15.000 years ago!
There’s also a chance – if you’re lucky and the sky is clear – you may see Mt Ngauruhoe and Mount Ruapehu in the distance (once you’re up above the falls).
If you do get to see both of them, you’re extremely lucky! Mt Ngauruhoe is a very iconic volcanic cone that you might know as Mt Doom from the Lord of the Rings movies.
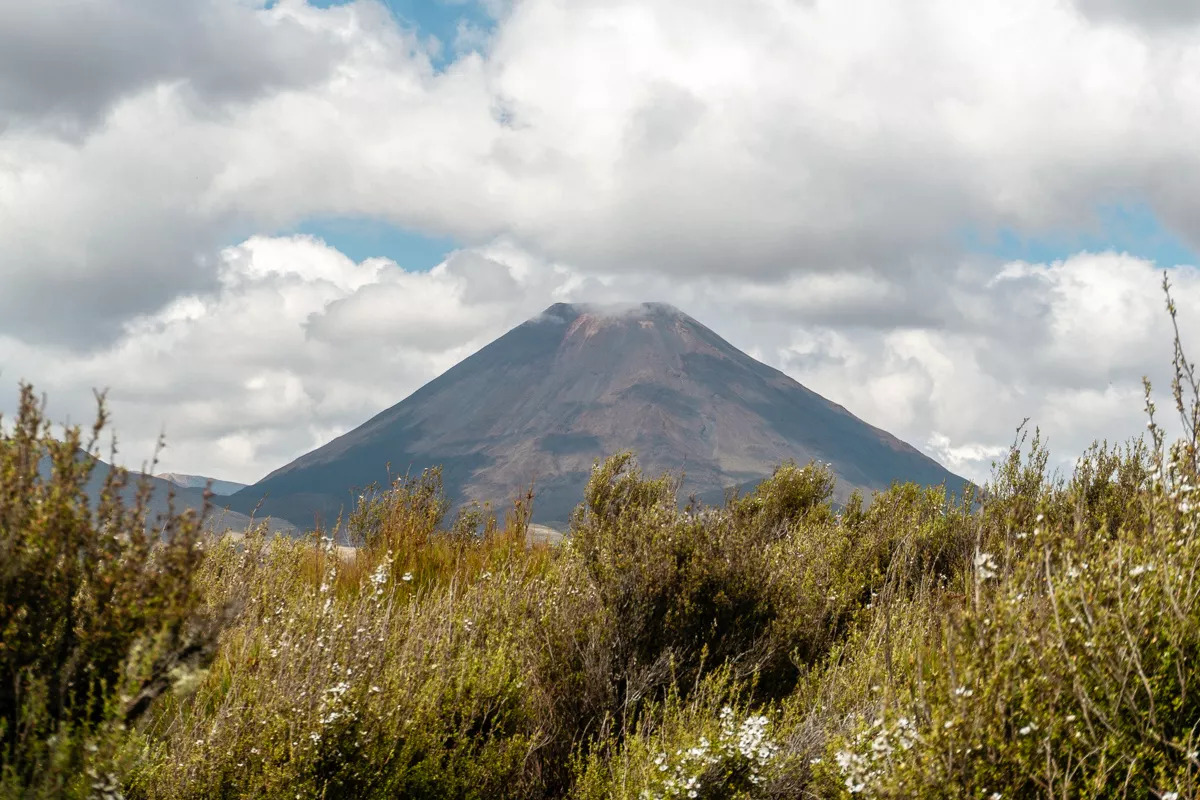
Mount Ruapehu is an active Stratovolcano and the tallest peak on the north island of New Zealand. It is also the only mountain with glaciers on it on the north island. The last time Mount Ruapehu erupted was in September 2007 so not that long ago!
Take in the beautiful views, snap some photos, and enjoy this little section of the Tongariro National Park!
As we mentioned, we did the Northern Circuit and stopped by the falls on our way back. So we’ve basically done the whole hike except for the short stretch between the signpost by the bridge and the falls.
Make your way back to Whakapapa Village
Once you’ve taken in the view of Taranaki Falls you can continue up the hill and up the stairs until you’re basically above the falls where Mount Ruapehu and Ngauruhoe hopefully will show.
At the top of the stairs, you take a right and then you make your way back toward Whakapapa Village.
This last section of the Taranaki Falls loop trail is also a part of the Northern Tongariro Circuit so you might end up bumping into other trekkers over here as well.
You might also meet people who’ve gone to Tama Lakes. More about this in the next section.
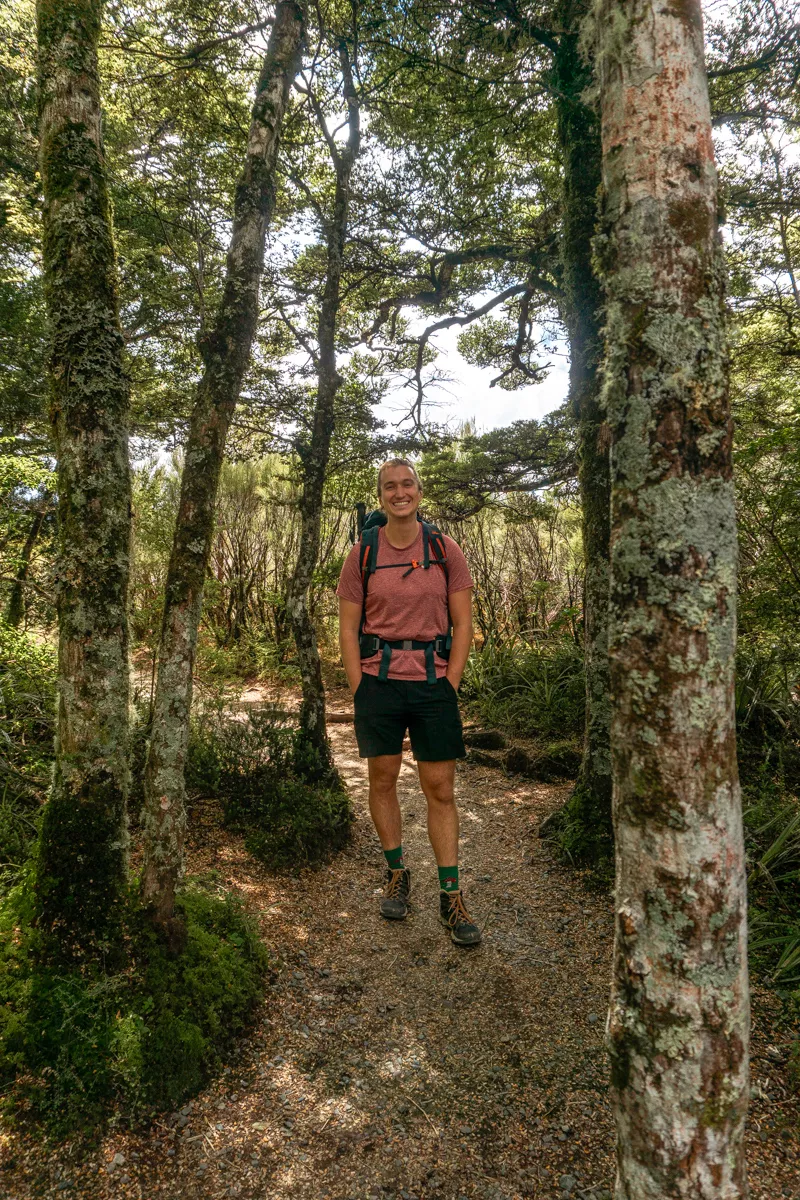
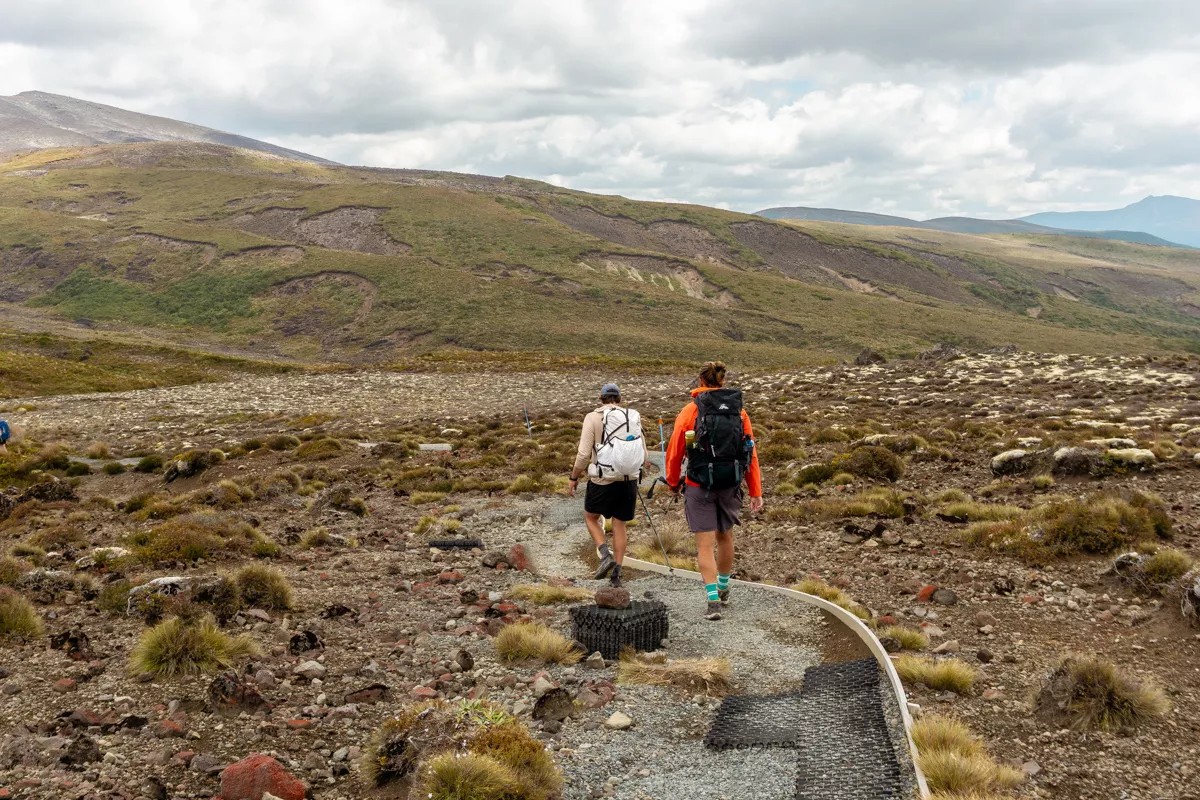
One thing we really like about the Taranaki Falls Hike is that even though it’s only 6 kilometres long, the trail and the surrounding nature change so much throughout the trek.
On this hike, you will be walking between dry bushes and grass, on volcanic rock, and through greener scenery where you’ll be surrounded by bushes and trees and hopefully some birds.
On this last stretch back to Whakapapa Village, there is going to be a bit of ascent but it’s a relatively easy walk back if you’re an experienced hiker. Especially when you can admire the volcanoes on your way back!
Optional: Stop by Tama Lakes
If you feel like going on a longer hike, you can add a trip to the Tama Lakes!
This will add 11.6 kilometres to your hike and the whole hike will take 5-6 hours instead of the 1.5 hours it takes to do the Taranaki Falls Loop Track.
Once you’re above the stairs (right after you’ve left the falls), you will take a left towards Lower Tama Lake and Upper Tama Lake.
If you feel like you’ve got more kilometres left in your legs (and enough food + water), you can add these two lakes to your walk!
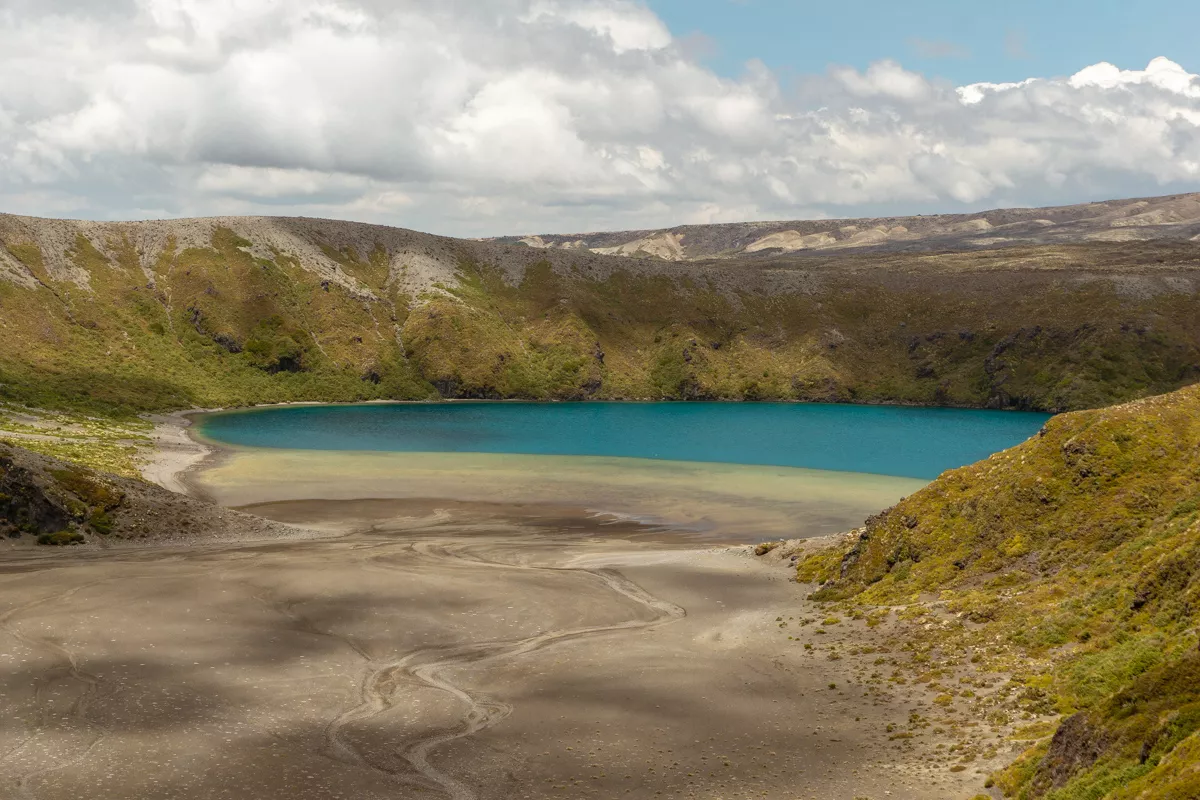
We went to the Lower Tama Lake and it was beautiful. After 4 days of hiking, we didn’t feel like hiking up to the Upper Tama Lake but it looks gorgeous in pictures.
You will also find a bathroom facility on the left-hand side at the beginning of the trail to Tama Lakes.
The trip to the lakes is an in-and-out trail so if you go, you just come back the same way you came from – and then continue on the Taranaki Falls Trail/Tongariro Northern Circuit Trail.
Stop by Skotel for a bite to eat
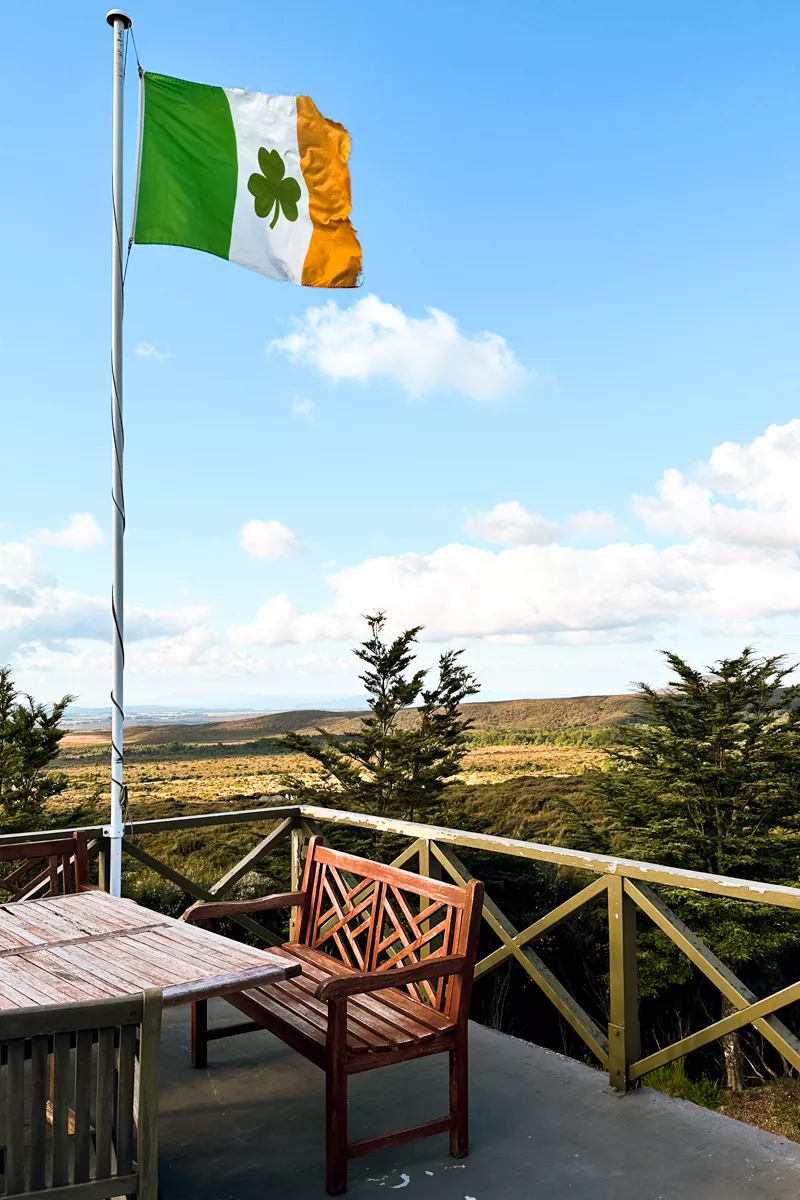

When we completed the hike, we stopped by the Skotel Alpine Resort for a bite to eat and a beer and the food was great!! It’s also a great place to stay if you’re looking for a hotel in Whakapapa Village.
They tend to book out during peak season so it’s good to book it a bit in advance once you know which dates you’re going. (You can check Skotel’s availability & prices here).
We went for burgers and beers after completing our hike and it was awesome! You have a beautiful view overlooking the national park – and the food and beer is really good there.
It’s always nice to end a hike with a little treat so if you do have the time then it’s definitely worth a stop.
There’s also a little coffee cart across from the parking lot in Whakapapa Village so you can stop for coffee there as well if you need one. Please note that the coffee cart closes around 3 pm during peak season but sometimes stays open a little longer!
If you do want to eat at Skotel, it is good to make a reservation as they have limited seats for lots of guests. You can stop by the day before or give them a ring to reserve a table.
📍 Want to know about all the best spots in Aotearoa New Zealand?
Then check out our New Zealand Maps with +200 locations around the country that we have visited during our 10 months of living and travelling in NZ! 🗺️
What to bring on the Taranaki Falls walk
This is one of those hikes in New Zealand where less is more. It’s still 6 kilometres so you’re going to want to bring enough water, a snack or two, and the right gear. But besides that, you really don’t need too much.
Of course, check the weather for Whakapapa beforehand and make sure the trail is in decent condition as well.
Packing list for Taranaki Falls:
- Water! We always fill up our LifeStraw bottles before hikes and day trips. We’d try to bring at least 1.5-2 litres for this hike so you have enough – especially during the summer months.
- Sunscreen!! There have been multiple occasions while we’ve been hiking in New Zealand where the UV index has shown between 8 and 10!! Even on cloudy days, you can get seriously sunburned. The sun in NZ is unlike anywhere else.
- A power bank is good to bring – especially if you plan to take lots of pictures and videos or if you want to go to Tama Lakes as well. It rarely happens that we finish a hike and our phones are dead but there are times when the power bank comes in handy!
- Hiking poles also come in handy. Although the hike is relatively flat, there are a few sections with uneven surfaces and it can get muddy if it’s been raining recently.
- Some snacks to enjoy at the Taranaki Waterfall.
To get some more inspiration, you can also check out this great list of hiking gear!
The best affordable camera for beginners

If you’re looking for the best and most affordable camera for beginners, check out the Sony Alpha a6000 Camera.
This is the camera we’ve been using for years and still use to this day.
It’s perfect for travelling and super easy to use – even if you’re a beginner.
Before you hike to Taranaki Falls
Check the weather in the Tongariro National Park
Rain or shine, you can hike to the falls but, of course, it’s going to be a lot more enjoyable if the weather is good.
You can see the weather forecast for the Whakapapa Village here which will give you a good idea of what to expect on the trail.
Wear hiking shoes
We wear hiking shoes or hiking boots on almost every outdoor adventure we do – this one included.
Even though it’s not a very challenging trail, there are sections (especially when it rains) that can get covered in mud – and there are a few sections that can get slippery.
Waterproof and good hiking shoes are definitely recommended.
Honestly, you might be fine wearing trail runners on this hike, but if you have hiking shoes, it’s best to wear them. That’s what we did.
If you don’t have any hiking boots, we highly recommend the Newton Ridge waterproof hiking boots from Columbia. Jo got these a few months ago and she loves them!
Leave no trace
When you go hiking (and do other outdoor adventure activities), always remember to follow the 7 principles of leaving no trace.
This means:
- Plan ahead and prepare.
- Travel and camp on durable surfaces.
- Dispose of waste properly.
- Leave what you find.
- Minimize campfire impacts.
- Respect wildlife.
- Be considerate of others.
Renting a car in New Zealand
For this specific hike, it’s best to have a car so you can get to Whakapapa Village.
There are definitely shuttles and other ways to get to Whakapapa but renting a car in New Zealand is the most convenient way to get to a lot of the hikes.
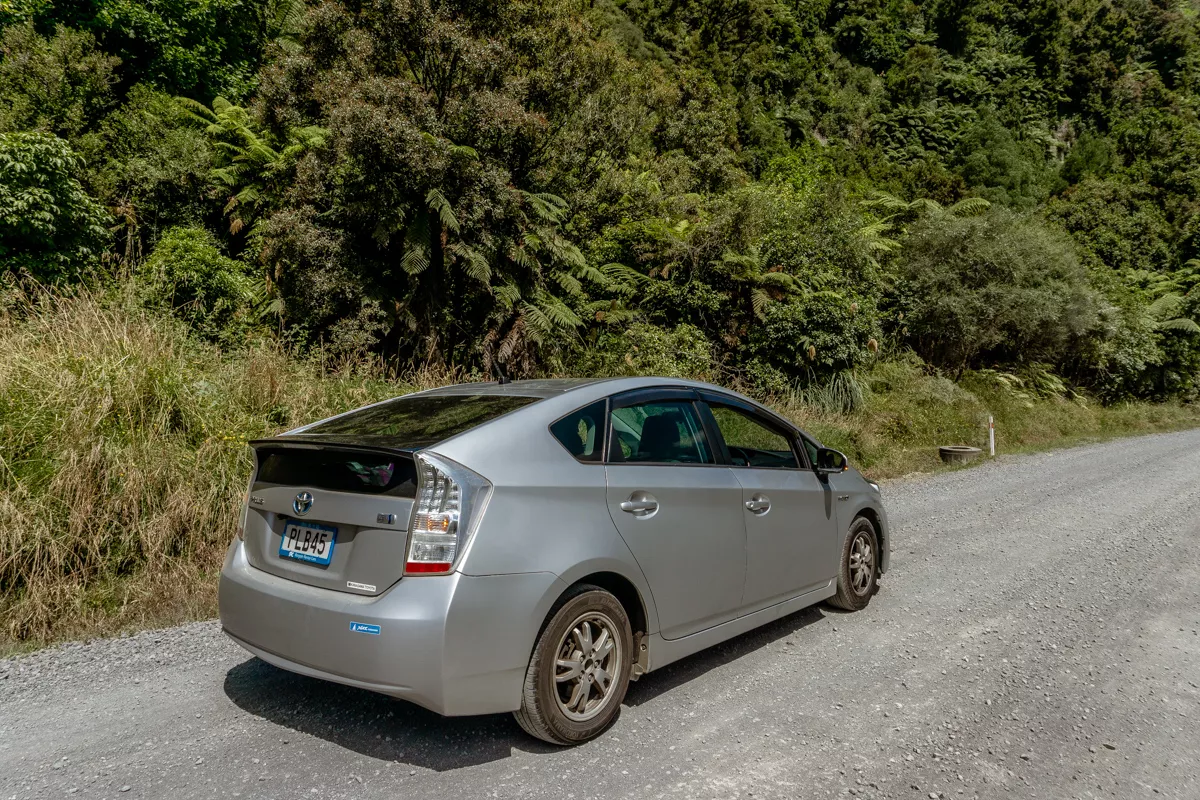
We’ve had a car hire here in New Zealand for our whole trip on the north island and it’s been really nice and convenient – especially when getting to some of the different trailheads.
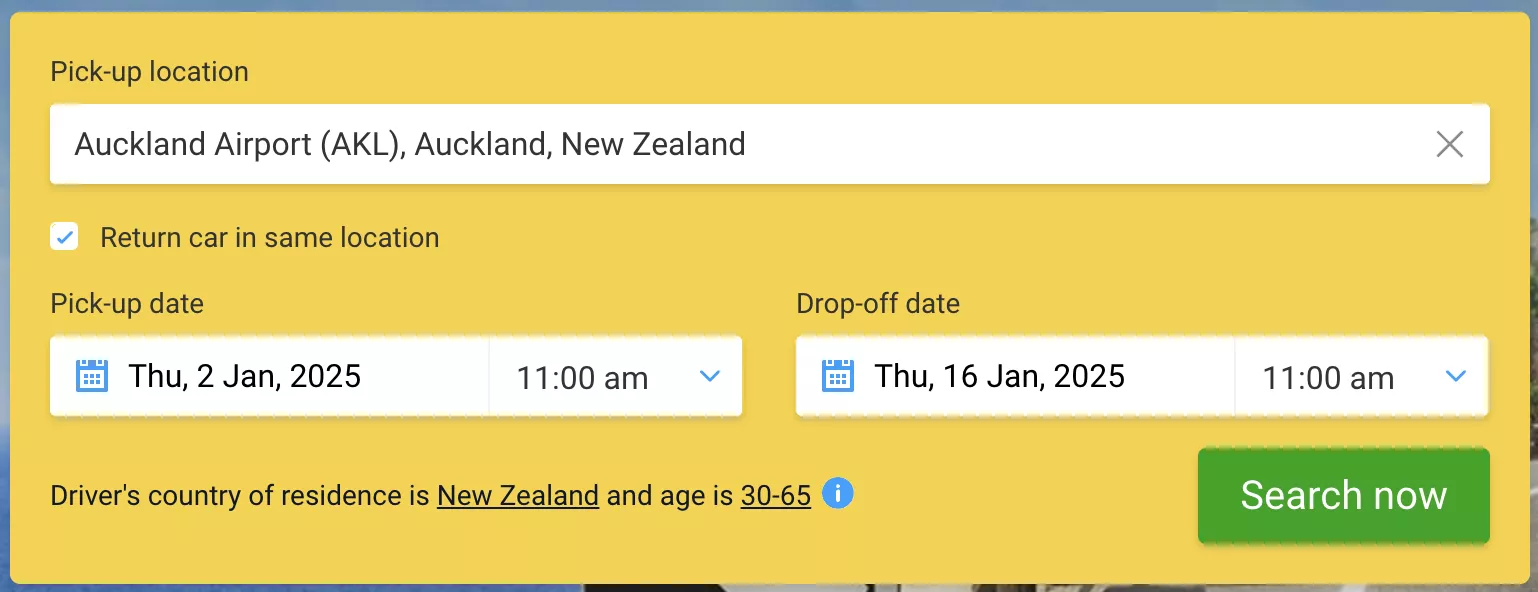
The car we booked was through DiscoverCars and we picked it up at Auckland Airport. DiscoverCars works like a search engine that compares all the different cars from different rental companies and shows you the best price.
It’s so convenient and we managed to snag a really good deal for our rental (we paid $50 NZD per day including full insurance during peak season).
The longer ahead you book your car, the more likely you are to find a good deal.
You can find and hire your rental car for New Zealand here.
Another option is also to rent a big enough SUV that you can sleep in some nights (this is what we did on the south island) if you want and save some money on accommodation or sleep in some more remote places! 😉
There is quite a nice holiday park in Whakapapa that you can stay at if you’re planning to sleep in your car or van.

PS: DiscoverCars doesn’t just work from Auckland Airport. It can be used at pretty much any airport or city in the World. We’ve also used them in Italy, Portugal, and the Czech Republic.
When is the best time to explore Tongariro National Park?
This is probably one of the most important questions to ask when planning on hiking and exploring Tongariro National Park.
The best time to come and explore this part of New Zealand is between January and March with February being the best one in terms of warmer weather and less rainfall.
Of course, this is a relatively small window (and it’s during peak season). You can visit anytime between November and March and still get quite good weather for hiking and trekking around the national park.
Tongariro National Park does get quite cold between June and October so we would completely avoid coming during those months if you’re planning to come for hiking!
June through October, on the other hand, is great if you want to go skiing as Mount Ruapehu is a great ski resort in winter!
How to get to Taranaki Falls trailhead
This trailhead is right in Whakapapa Village. If you plan to stay the night at either the Whakapapa Holiday Park or Skotel Alpine Resort (which are some of the only places of accommodation in Whakapapa), you can easily walk to the Taranaki Falls trailhead.
Otherwise, there is a huge car park where you can park your car for the day!
We left our car there for 4 days while hiking the Northern Tongariro Circuit and it wasn’t a problem (we got an overnight parking permit from the visitors centre).
From Auckland to Taranaki Falls trailhead:
- It’s roughly a 4.5-hour drive from Auckland to the trailhead.
- You can find the directions here.
Taupo to Taranaki Falls trailhead:
- It’s roughly a 1.5-hour drive from Taupo to the Taranaki Falls trailhead.
- You find the directions here.
You may also like…
- Stunning Tawhai Falls (Gollum’s Pool) in Tongariro National Park
- Hiking to the Iconic Pouakai Tarns Overlooking Mount Taranaki
- Hiking to the Top of Paritutu Rock for Sunset
Recap of hiking to Taranaki Falls in Tongariro National Park
Taranaki Falls is a relatively easy hike to do in the Tongariro National Park with beautiful views!
The hike starts right in the village and can be done as a loop trail or as an in-and-out trail if you’re looking to see the waterfall as quickly as possible.
One of the best parts of doing the Taranaki Falls loop trail is that it gives you a good taste of what it’s like hiking in this national park.
You get to see a bit of the rough volcanic landscape but you also get to see the beautiful green flora, trees, and birds.
As we mentioned earlier in this post, on a clear sunny day you can see Mount Ruapehu and Ngauruhoe which is just breathtaking!
If you have questions about the hike, where to stay in Whakapapa Village, or anything else related to New Zealand, you’re more than welcome to DM us on Instagram or leave a comment below.
We hope you enjoy this amazing area in New Zealand!
📍 Save this post for later & share it with a friend