How to Hike up to Yates Mountain Lookout from Barrier Lake
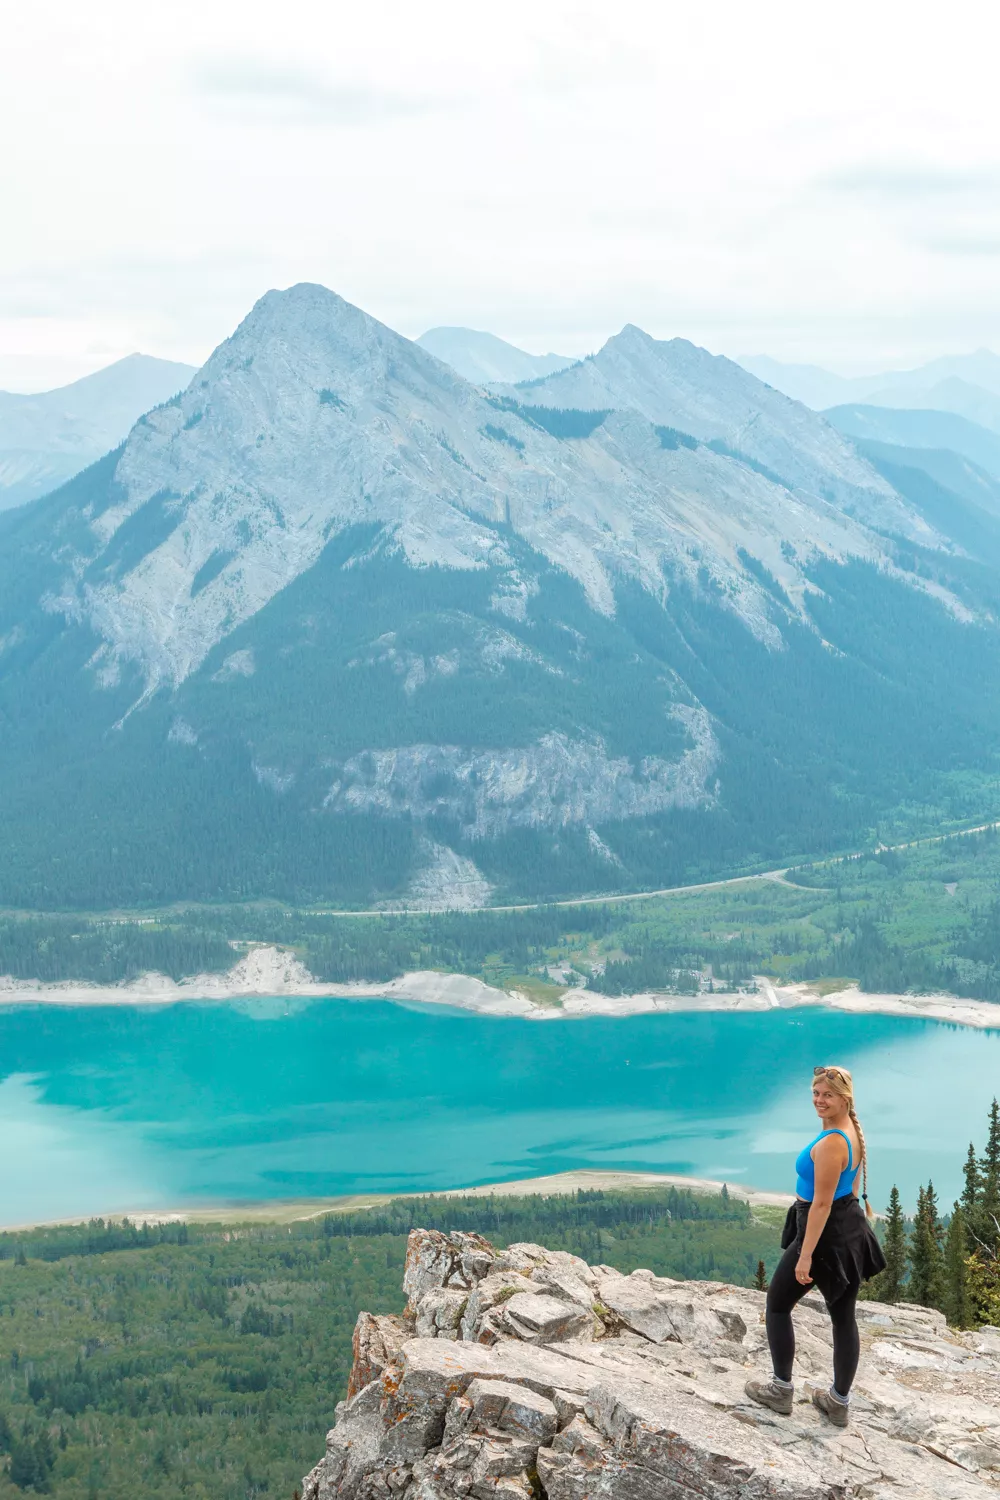
If you’re planning a trip to the Canadian Rockies and you’re looking to smash out a peak in Kananaskis with amazing views not too far from Calgary then Yates Mountain via Barrier Lake is a great option! From the first viewpoint on this trail, you will get an incredible view of Barrier Lake and Mount Baldy!
If you continue up to the summit and Barrier Lake Fire Lookout you will be able to get a 360 view of the Canadian Rockies, Lac Des Arc, and the Albertan prairies.

There are multiple ways to hike up to Yates Mountain and you can decide to either go up just to the viewpoint that overlooks Barrier Lake and Mount Baldy or you can continue to the summit.
This hike can also be done either as a loop trail or as an in-and-out trail from either side. In this post, we’ll mention the different trails you can take, which one we did, and the one we recommend!
Disclaimer: This post contains affiliate links which means if you decide to use the links and make a valid purchase, we will receive a small commission at no additional cost to you. Thank you for your support!
Everything you need to know about hiking Yates Mountain
In this post, we share our experience of hiking from Barrier Lake up to Yates Mountain and down through Jewell Pass. Yates Summit via the Prairie View Trail is one of the easiest summits in Kananaskis and the Canadian Rockies so if you’ve been wanting to reach a summit, this hike is a great option!
As we mentioned before, there are multiple different ways you can do this trail to get to the viewpoints and the summit.
We did the loop version of this trail which is also known as the Jewell Pass via the Prairie View trail. This is the longest hike you can do to Yates Mountain and the Barrier Lake Fire Lookout but it is also supposed to be the one with the most beautiful views.
The hike is relatively easy to follow once you know where you’re going but it’s definitely a good idea to load the map beforehand and read through this post so you’re prepared! There are quite a few different trails on Yates Mountain and not all of them lead to the viewpoint and summit so it can get a little confusing if you’re unsure where to go.
Before we dive into the trail directions, we want to mention that you will need a Kananaskis Conservation Pass in order to do this hike. Kananaskis isn’t a national park so there is no need for the Parks Canada Discovery Pass as it doesn’t cover Kananaskis but instead, you will need a Kananaskis Conservation Pass.
That means that if you already have a Parks Canada Discovery Pass you still need to buy the Kananaskis Conservation Pass as well. The reason why the Discovery Pass doesn’t cover Kananaskis is because the Discovery Pass is for national parks and Kananaskis is a provincial park.
You can read all about the Kananaskis Conservation Pass here including how much it costs and how it works.
Fun fact: The peaks and valleys in Kananaskis are 12,000-year-old reminders of the last Ice Age that hit this part of Canada!
Practical information about Jewell Pass via Prairie Trail (Yates Mountain)
Distance: 15.4 km return / 9.57 miles return
Elevation: 905 m / 2967 ft. elevation gain
Type: Lollipop trail (basically a loop trail)
Length: 5-6 hours return (including breaks)
Difficulty: Hard
Rating: 4 out of 5 stars
Click here to see a trail map for Jewell Pass via Prairie Trail
Here’s a picture of the beginning of the Yates Mountain hike

We want to acknowledge that Bow Valley Provincial Park and Yates Mountain is on the traditional territory of Ktunaxa, Ĩyãħé Nakón mąkóce, Niitsítpiis-stahkoii, Tsuut’ina, and Michif Piyii.
Starting at the Barrier Dam day-use area

The Barrier Dam is one of the first things you’ll see once you turn off from the Trans Canada Highway to the Kananaskis Trail. The parking lot is the first turn-off on the Kananaskis Trail Highway on the right-hand side. There will be signage towards Barrier Lake so it’s hard to miss.
Once you see the lake, there’s a good chance that the parking lot will be packed with people since it’s a popular area to hang out and enjoy the mountains. There is a bigger parking lot on the right-hand side though so you should be able to find a spot – and the Yates Mountain via Prairie Trail doesn’t get overly crowded.
The majority of the people who park their cars at the Barrier Dam day-use area usually come for picnics, mountain biking, or kayaking and paddleboarding on Barrier Lake. So although the parking lot may be full, you should definitely have stretches of the hike to yourself which is really nice!
Continue along the Prairie View Trail towards Yates Mountain

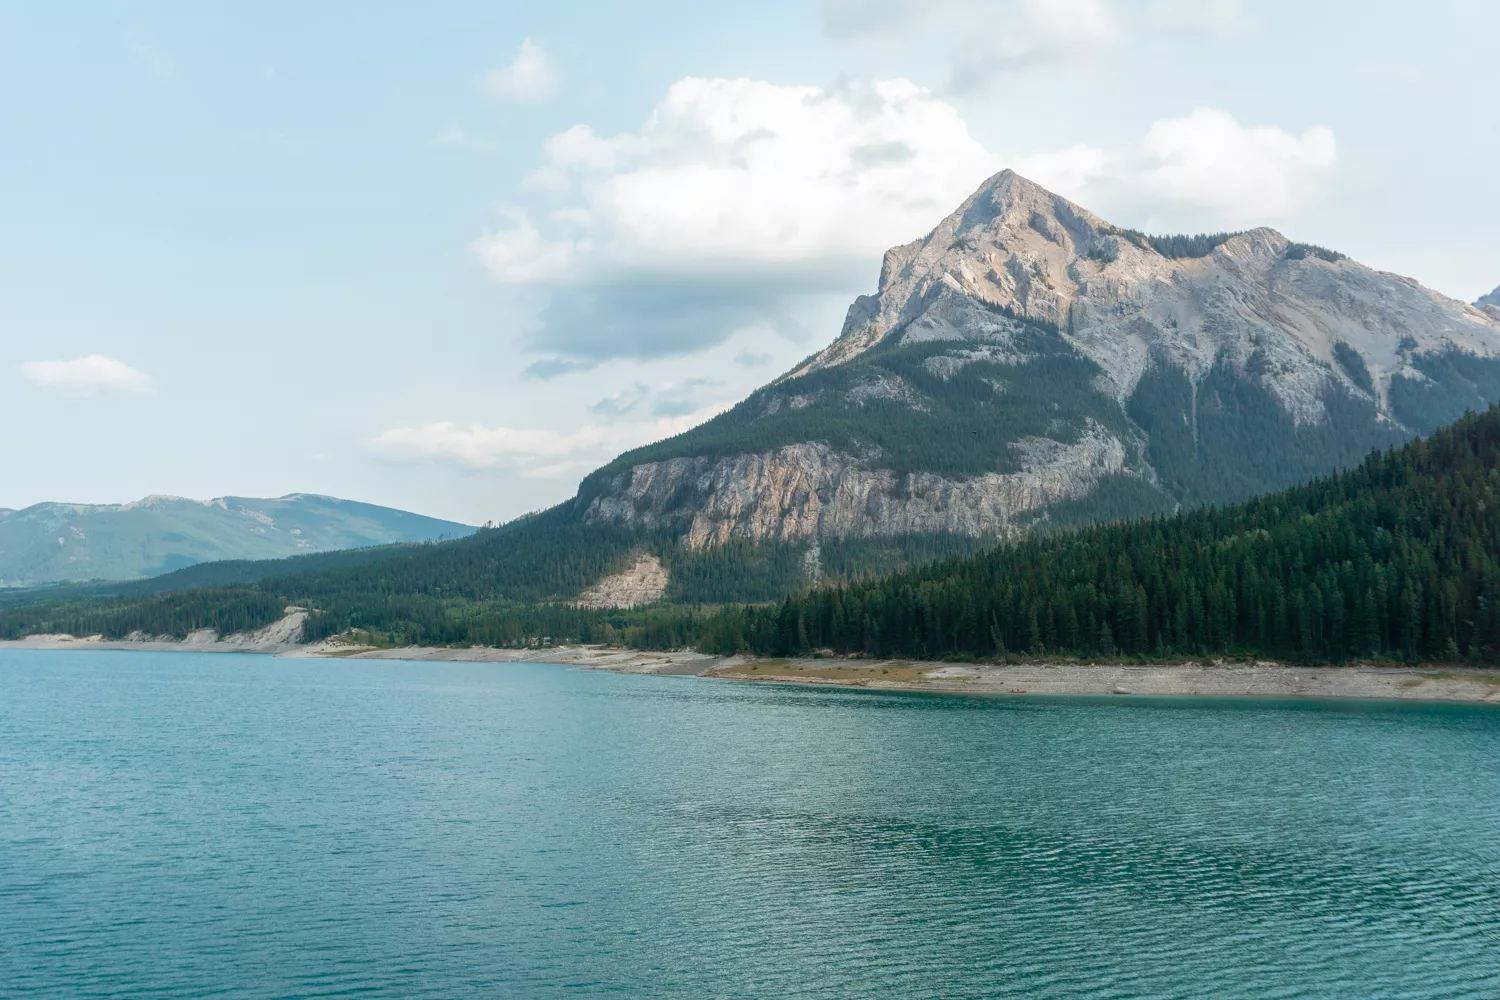
I’ll be completely honest and let you know that the trail at the beginning of the hike from the parking lot isn’t the most exciting as the trail is just walking on gravel and there is zero elevation. Thankfully you have the stunning Barrier Lake Reservoir and Mount Baldy to admire as you’re walking on this gravel stretch of the hike.
Make sure to take some pictures here (you’ll have a chance on your way back as well) because, especially with Mount Baldy in the background, the view of Barrier Lake is amazing from here! Once you’re done, you can continue following the trail into the trees. As you leave the Barrier Dam day-use area, you’ll find the Prairie View Trail, which is the trail that starts once you enter the forest.
You can always look back on the AllTrails map for Yates Mountain here to know you’re going the right way.
We’ve also created a free custom trail map for Yates Mountain on Mapy here.
Hiking Tip: Look up the trail on AllTrails before starting your hike 🗺️. You can find important trail information, such as recent wildlife sightings and trail closures. Check out the free version here or get a 7-day free trial of AllTrails+ here.
Up the mountain via Prairie View Trail


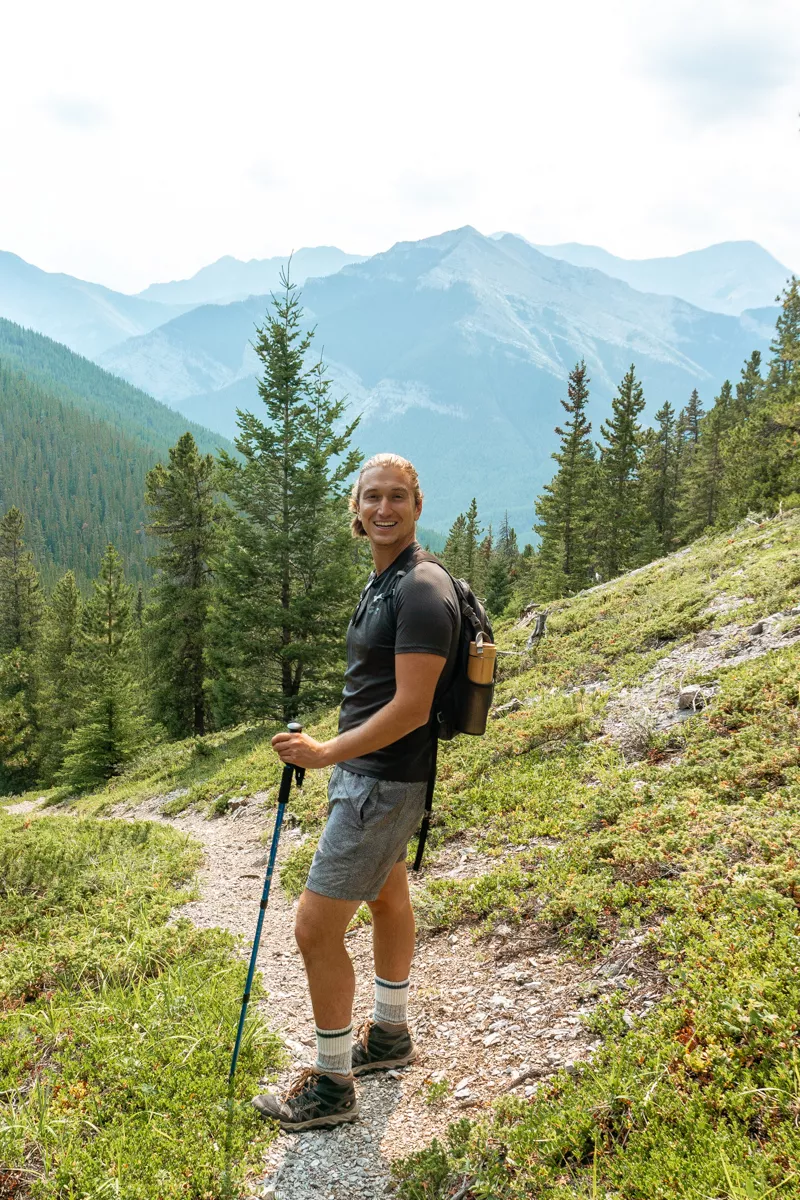
Now the real fun starts – at least if you enjoy a bit of incline like we do! There is going to be an intersection right before you start making your way up the mountain. This intersection is where Prairie View Trail and Stoney Trail connect. You want to go on the Prairie View Trail!
Make sure you continue along the trail like you’re going up the mountain and you’ll be on the right track towards Yates Peak! The trail has plenty of zig-zags which is really nice so the incline doesn’t feel too crazy. You’ll also see some shortcut trails and these are the trails used by mountain bikers.
We always recommend staying on marked trails to preserve the area but these shortcut trails are real trails. As long as there are no bikers they’re fine to hike on. They’re basically just steeper and cut the corners of all the zig-zag trails!
A thing we want to mention here is to check out the different types of trees and plants you see throughout the hike. It’s crazy that even on a 15 km hike like this, the nature changes so much! At the beginning stretch, you’ll see tons of larch trees, so this is an awesome area to come in the fall if you’re looking for some larch hikes in Kananaskis.

Throughout the trial, the vegetation changes so much. You’ll see the trees changing from larch to pine and you’ll also walk through an area where there was a forest fire a while back.
There you’ll see lots of wildflowers bloom and grow as the forest is restoring itself. In general, this is a pretty good hike to see wildflowers!
Up the mountain via Prairie View Trail

This section can be quite challenging as there’s a good chunk of incline but you’ll get rewarded with some of the best views you could possibly imagine!
There are technically three viewpoints waiting for you: The first two are right next to each other and are waiting for you right after you finish this bit of incline. Those two viewpoints both give you great views of Barrier Lake and Mount Baldy! The third viewpoint will be at the summit and the Barrier Lake Fire Lookout.

We recommend snapping a picture at the first viewpoint (you’ll know once you’re there) and then stopping at the second viewpoint for lunch. There are lots of rocks you can sit down on and take in the views while you catch your breath.
Both views are fantastic but there is a lot more room at the second viewpoint overlooking Barrier Lake! That was probably the most crowded section of the hike since there were quite a few people with the same idea as us to have lunch at this awesome viewpoint!


One thing we want to mention here is that once you reach the viewpoint, there are likely going to be plenty of birds and chipmunks hanging around. This is likely because they get fed a lot by humans.
If you’re up there please don’t feed the wildlife! We know it can sound fun to feed them and have them come up to you but it’s really bad to do.
Human food is not made for animals and the preservatives in our food can actually harm the long-term health of these animals. You can read more about why you shouldn’t feed wildlife here. They are smart creatures and find food all over the mountain!
One last summit to Yates Mountain Viewpoint

The second viewpoint on Yates Mountain is the last spot to take in the views of Barrier Lake and Mount Baldy before embarking on to the summit.
There’s one more section of uphill hiking before you reach the final and third viewpoint where you’ll see the fire lookout and helicopter landing spot!
Not everyone makes their way up to the summit as the best view is from the second viewpoint. However, since we already made it this far we decided to reach the summit as it didn’t add a lot of distance to our total hike.

You’ll make your way past saying “Trail Not Maintained” (please go at your own risk) and up McConnell Ridge. At the end of the ridge, you’ll find the peak of Yates Mountain!
This is the highest point on this hike and from here you get a completely different view compared to the first 2 viewpoints!
Here you’ll see the beginning of the Canadian Rockies, the Trans Canada Highway, the Prairies, and maybe even The Stoney Nakoda Resort & Casino!
We actually had an awesome experience at the Yates Mountain Lookout! There are 127 fire lookouts in Alberta and one of them is at the top of Yates Mountain.

We actually had the chance to speak with Shane who has been living at this fire lookout for the past 5 summers and before that, he’s lived at a few different ones around Canada.
Shane’s story is super cool and he told us that when he’s not working, he spends time writing music about his experiences at the fire towers. You can check out Shane’s music here.
It was really cool talking to him and learning a little about his role and what he does. I’m sure he was excited to also get some human interaction since he is quite isolated up there.
If you’ve never heard of fire lookouts before you can check them out on this Alberta site which explains the purpose of them and how they work!
👩🏼⚕️ Is your trip insured?
SafetyWing’s Nomad Insurance covers hiking and mountaineering up to 4500 meters 🏔️
Back to the Prairie View Trail towards Jewell Pass
Once you’ve taken in all the views from Yates Summit you can slowly make your way back down McConnell Ridge and back towards Prairie View Trail.
The first little section down is the same as when you came up but if you want to do the loop (lollipop) trail like we did, you will eventually take a right.
The easiest way to find this trail is by looking at this map.
Keep in mind that this is the longer version of the hike. There are other shorter versions of the hike and we’ll briefly get into those at the end of the post.
The trail down will eventually connect you to the Prairie View Trail again but (if you decide to do the loop trail) this time you will continue the other way than you came up.
This trail continues for roughly 2.5 km until you reach an intersection and the Jewel Pass!

We loved the section towards Jewell Pass! The trail is open, easy on the feet, and quite flat. The trees are also completely different from the larch trees we saw early on in the hike – and the wildflowers have been replaced by mushrooms!
If you know how to spot them, you’ll be able to see tons of mushrooms, berries, and squirrels on the way to Jewell Pass. This section of the trail is super straightforward and easy to follow.
It’s also nice that this section of the Prairie View Trail is quite flat and gives you a bit of a break from all the incline and decline that you’ve had up until now.
After 2.5 kilometres of walking, you’ll come to an intersection where you’ll see a map of where you are and which trails lead where.
At this point, you’ll take a left and continue your walk on the Jewell Pass Trail heading back down towards Barrier Lake.
Hike back down from Jewell Pass to Barrier Lake

Most people who hike to Yates Mountain don’t actually end up doing this section of the trail as they just do it as an in-and-out trail.
That’s why we recommend that you do the full loop so you can enjoy this trail section too!
There are way fewer people, the scenery is amazing, and during spring and early summer, you’ll get to see the runoff flow down next to the trail – and you might even see a waterfall too!

The trail is super easy to walk on as well. It’s pretty smooth without too many rocks and it’s constantly up and down which feels good on the knees.
It’s totally different from all the zig zags and mountain bike trails that you took from Barrier Lake to the summit.
Besides the viewpoints from the top of Yates Mountain, this is probably our favourite section of the hike! It definitely helped that we were walking here around golden hour so the light was super pretty!
As you get further down the mountain, Barrier Lake and Mount Baldy will slowly start to become visible again as you’re approaching the last section of the hike.
Back to the Barrier Lake Parking Lot
Now it’s time for the flattest part of the whole hike. This last section takes you from one side of Barrier Lake all the way back to the parking lot.
Some people don’t like doing the whole loop trail because you have about 4.5 kilometres of flat trail next to the lake to finish off the hike.
Doing the loop trail instead of doing the hike as an in-and-out trail does add an extra hour to the hike. In our opinion, it’s totally worth it though!
And if you time it right and come down around golden hour, the walk back will be extremely pretty!
Even if you don’t, though, you still have Barrier Lake and Mount Baldy to look at and admire on your hike back to the car. Although we were tired at this point, we actually really enjoyed it.
You can also stop by the lake and have a little picnic to finish off the hike if you still have any snacks left!
What to bring on the Yates Mountain hike

A day trip to the mountains means there’s a bit of preparation to be done!
Weather conditions can change, you might get tired, and we always say to expect the unexpected. It’s better to be overprepared than underprepared.
Below you’ll find a list of the things we suggest you bring on this hike.
Packing list for Yates Mountain:
- Water! We always fill up our LifeStraw bottles before going on a hike. You might have a chance to fill it up towards the end of the hike as well if there’s enough water at that time of year (we did!).
- Sunscreen is good to have especially during the summer months in Alberta. Although you are in the trees for a good chunk of the hike, the sun still shines through – and you’ll need it at the viewpoints and at the summit.
- A power bank is nice to have because you don’t want to run out of battery while hiking in the mountains. The Yates Mountain hike is fairly long, so a power bank will come in handy.
- You’ll definitely want to pack a bunch of food for your day trip! Although there is a Tim Hortons a 5-minute drive from the trailhead, it’s good to plan in advance and bring a bunch of snacks and lunch.
- Remember to pay for and bring your Kananaskis Conservation Pass.
- Bear spray! Kananaskis and the Canadian Rockies is bear territory. Bring your bear spray and know how to use it!
- Hiking poles are great to have on this hike! There’s a decent amount of elevation so having your hiking poles with you is a good idea.
You can check out this great list of hiking gear to get some more inspiration!
Before you go to Kananaskis and hike Yates Mountain
Check the weather in Kananaskis
As a rule of thumb, you should always check the weather before you go hiking in the mountains. It’s always good to be prepared even though the weather in the mountains can be a bit unpredictable at times.
You can see the weather for the Barrier Lake area here.
Wear hiking shoes
There are a few scrambly sections and a ton of elevation. The trail is in awesome condition but we personally wouldn’t do this hike without proper footwear!
We 100% recommend wearing hiking shoes if you plan to hike up to the Yates Mountain Lookout.
If you’re looking for inspiration, we can highly recommend these Newton Ridge Plus Waterproof Amped Hiking Boots from Columbia!
Other hiking options from Barrier Lake

The hike we mention in this post is the longest trail you can do going up to Yates Mountain.
One of the shorter ones we recommend is the in-and-out trail from Barrier Lake to Yates Mountain and straight back down.
You can find all the details about the Prairie View Trail to Yates Mountain here.
One of the other hikes we recommend is the Barrier Lake trail. There is almost no elevation and takes you around one side of Barrier Lake.
You can find all the information about the Barrier Lake Trail here.
Be bear aware
When hiking in bear territory, you can take specific precautions to minimize the likelihood of a bear encounter.
Bears typically have no interest in encountering humans, so by implementing these proactive measures, you can significantly reduce the chances of encountering them.
Some of the easiest precautions you can take are:
- Make noise and let the bears know you’re there.
- Be alert by paying attention to your surroundings and watching for signs of bear activities.
- Hike in groups of 4 or more whenever possible.
- Stay on designated trails.
- Check online to see if there’s been any recent bear activity in the area.
- Bring bear spray wherever you go. It’s your last line of defence and even though you hopefully never have to use it, it may just be the thing that saves your life. Make sure you know how to use bear spray as well before you go hiking.
If you ever see a bear in the wild, there are a few tips and things you should remember :
- Stay calm and slowly back away from where you saw the bear. Keep an eye on the bear but continue to walk backwards away from its territory.
- Start looking for a safe place to go. Try and get to another group of hikers. The bigger the group the better.
- Know that black bears and grizzly bears act differently so it’s important to identify what type of bear you’re seeing and then know how to act accordingly!!
Here is a great article from Parks Canada about bear safety, encounters, and attacks.
Leave no trace
When you go hiking (and do other outdoor adventure activities), always remember to follow the 7 principles of leaving no trace.
This means:
- Plan ahead and prepare.
- Travel and camp on durable surfaces.
- Dispose of waste properly.
- Leave what you find.
- Minimize campfire impacts.
- Respect wildlife.
- Be considerate of others.
Best time to hike Yates Mountain in Kananaskis

We hiked up Yates Mountain via Prairie Trail and back down via Jewell Pass in July which is peak summer – and it was stunning!
But the best time to do this hike would be on a nice fall day in early or late September when the leaves start to change colours and the forest really comes to life.
There are plenty of larch trees around Barrier Lake and in the fall, it is so beautiful when the whole landscape changes to all the orange, yellow, and brown colours!
Camping spots near Barrier Lake
There are quite a few good camping spots in the Bow Valley Provincial Park near Barrier Lake. You can actually hike up to Yates Mountain from a few of the campsites too.
You don’t have to go far to make the most of your time in the mountains!
Jewell Bay Backcountry Campground
This is a great campground on the far side of the Barrier Lake Reservoir.
If you do end up camping here we’d recommend doing the hike clockwise instead of counterclockwise (so backwards of this guide).
This way you don’t have to take your camping gear with you for the whole hike and instead you can drop it off at the campsite and continue up Jewell Pass to Yates Mountain.
You can check the availability and book the Jewell Bay Backcountry Campsite here.
Quaite Valley Backcountry Campground
Quaite Valley Campground is on the other side of Yates Mountain on the Trans Canada side not far from the highway! You can find all the information you need on how to book Quaite Valley Campground here.
You can access Yates Mountain from the backside if you stay at this campsite and it’s usually a bit quieter here.
It’s the perfect campsite to stay for a few nights in the Bow Valley Provincial Park if you want to hike in the area and explore the mountains there!
How to get to the Yates Mountain trailhead

From Calgary to Barrier Lake
- It’s just over an hour’s drive from the centre of Calgary to Barrier Lake
- You can find the directions from Calgary to Barrier Lake here.
Anywhere in Canmore to Barrier Lake
- It’s roughly a 30-minute drive from Canmore to Barrier Lake
- You can find the directions from Canmore to Barrier Lake here.
From Edmonton to Barrier Lake
- It is a 4.5-hour drive from Edmonton to Barrier Lake.
- You can find the directions from Edmonton to Barrier Lake here.
Other related questions about Yates Mountain and Barrier Lake

What is the elevation gain of Yates Mountain?
If you hike from Barrier Lake parking lot up to the peak of Yates Mountain you have roughly 905 meters of elevation on the way up. It does sound challenging but the elevation gain is very steady and gradual.
Is Yates Mountain an avalanche risk?
There is no avalanche risk at Yates Mountain and that’s why it’s also one of the most popular winter hikes to do in the Canadian Rockies.
Yates Mountain is definitely worth summiting in the winter if you want to get outdoors and up in the mountains.
If you ever want to know about the avalanche risk on a specific hike, check out Avalanche Canada.
Can I swim at Barrier Lake?
You will see kayaks, canoes, and stand-up paddle-boards on Barrier Lake but the lake itself is too cold to swim in. We do not recommend swimming in Barrier Lake.
Do I need a pass for Barrier Lake?
Yes, Kananaskis has implemented a new pass for the area. This pass is different from the Parks Canada Pass.
You’ll need a Kananaskis Conservation Pass that you can buy online to park in the area legally.
How hard is the hike to Barrier Lake?
There are multiple Barrier Lake hikes and they range from relatively easy to quite challenging. There are trails that take you just around the lake and some that take you all the way to the top of Yates Mountain.
You may also like…
- 5 Amazing Hikes in Kananaskis Country You Must Do
- Tombstone Campground Hike – Stunning Alpine Lake in Kananaskis
- The 5 Best Hostels in Banff, Alberta
- 3 Beautiful Hikes Near Bragg Creek That Make an Epic Day Trip
- Fun and Challenging Black Rock Mountain Hike Near Calgary
Recap of hiking Yates Mountain near Barrier Lake

If you’re looking for a fun, exciting, somewhat challenging but not crazy hard hike in Kananaskis, Yates Mountain via Prairie View Trail is the one and you also have Wasootch Ridge not far away either!
It is quite steep to get up to the top of Yates Mountain but it’s nothing crazy for being in the Canadian Rockies!
The trail is super easy to follow and you have a few different options depending on how far you want to hike.
We also love that the Kananaskis area is quite close to Calgary and sometimes less crowded than some of the popular hikes in Canmore and Banff.
If you have questions about the different trails you can take up to Yates Mountain, camping in the area, or Kananaskis in general, feel free to message us. You can either DM us on Instagram or leave a comment below!
We hope you have an awesome time exploring Barrier Lake and hiking in the Canadian Rockies! It’s one of our favourite places on this planet for a reason and we hope you enjoy it too!
📍 Share & save for later!


