Hiking and Chasing Waterfalls – Levada Do Caldeirão Verde Trail
Levada do Caldeirão Verde is another one of those hikes on the island where you get to experience some pretty incredible waterfalls around Madeira. There’s one about halfway into the hike, and then the giant Caldeirao Verde at the end, which is one of the most powerful waterfalls we’ve ever seen.
Get ready for an epic trail that starts from one of the most beautiful gardens on the island. Parque das Queimadas is where the Levada do Caldeirão Verde and Caldeirão Inferno begin.
The park alone is so beautiful, you could spend an hour exploring around the miniature Santana Houses and the peacocks roaming around. The real fun begins on the levada trails though!
You can expect a beautiful, lush walk through the forest next to a levada with the most incredible views of the green mountains here – but also with some steep drops and tunnels you need to hike through, which make it a fun adventure.

Disclaimer: This post contains affiliate links which means if you decide to use the links and make a valid purchase, we will receive a small commission at no additional cost to you. Thank you for your support!
What to expect when hiking PR9 Levada do Caldeirão Verde
Quick breakdown of your trip:
- 🚘 Rent a car for your trip through Discover Cars
- 🌂 Or book a guided tour through GetYourGuide
- 👩🏼⚕️ Make sure your adventures are insured with SafetyWing
- 🎒 Pack a yummy lunch, a head torch, and a power bank
- 👞 Wear waterproof hiking shoes on this trail
- 📸 Bring your camera and get Insta ready
- 💦 Stay hydrated with a LifeStraw water bottle
Caldeirão Verde is a stunning hike that takes place near Santana up in the Madeira mountains. It is your typical Levada trail with not too much incline so it is a relatively relaxed trail.
The trail is also very easy to follow and once you leave the Parque Florestal das Queimadas it’s basically a straight-on hike until you get to Caldeirão Verde.
Fun fact: There are over 3000 kilometers of Levadas in Madeira!
One thing you can expect on Caldeirão Verde is that there’s a good chance you’ll either get wet by a small waterfall that splashes on the trail or one of the caves may be flooded by water if it recently rained. We walked through a cave that had water up to our ankles.
Thankfully our hiking boots are waterproof but lots of people were wearing just regular running shoes. So be prepared to get wet on this hike!
Another thing to expect when you hike the PR9 Caldeirão Verde is that there are a few sections that if you’re afraid of heights, it might seem a little steep for you.
The sections are small but it’s good to warn people beforehand. I don’t want you to get halfway into the hike and then turn around because there’s a section that might not be for you if you’re afraid of heights! But there are railings everywhere and we felt super safe on the hike.
With all that being said, you can also expect to see a few incredible waterfalls along the way. The first bit of the hike is mostly shaded and under the trees, but about halfway through it opens up a bit more and you start to get some incredible views of the coast and the mountains.
Practical information about hiking the PR9 Levada do Caldeirão Verde
Official trail name: PR 9 – Levada do Caldeirão Verde
Distance: 13.7 km return / 8.5 miles return
Elevation: Roughly 200 m / 650 ft. elevation gain
Type: In and out trail
Length: 4-5 hours total (includes time for pictures and hanging out at Caldeirão Verde)
Difficulty: Moderate-hard (because of the distance and tunnels)
Rating: 4.5/5
Click here to see a map of the beginning of the Levada do Caldeirão Verde trail.
Here’s a picture of the beginning of the Levada do Caldeirão Verde

Starting at the Parque Queimadas
The Parque Queimadas is the starting point for Caldeirão Verde and a few other trails. It may be fairly busy at the beginning of the hike but not everyone will be going towards Calderão Verde as it’s probably the longest and toughest hike in the area.
You’ll find a little shop, tourist building, toilets, and a map of the area at the beginning of the trail. It’s a nice place to stop and make sure you have everything you need for the hike before heading to the levada trail.
The park itself is beautiful and lots of people who come up to Parque Queimadas come only for this park with the Santana Houses and birds. Not everyone knows about Caldeirão Verde which is a shame because it’s one of our favourite hikes on the island.
You’ll see a few signs pointing towards the Levada trail and as you walk through the park the trail will start.
Hiking to the first waterfall along the PR9 in Madeira


Once you’re out of the park you’ll come to the actual trail that you will follow all the way until the big Caldeirão Verde waterfall at the end but before that, you’re going to walk through some beautiful forest.
The beginning section is a little boring as it’s not as open as the rest of the hike but you still get a feel for the area and the mountains and greenery all around. You’ll also have the Levada running parallel with you along the hike.
After doing a few hikes in Madeira, you’ll figure out that about 90% of the hiking trails have “Levada” in the name and it’s because most of the trails were built around these Levadas aka man-made irrigation systems.
As you’re following the trail, a waterfall will appear on your left-hand side and we absolutely loved this one. We ended up actually having a coffee next to it on our way back but the first time passing it we ended up taking some photos and enjoying this beauty!
If you like taking pictures this is a good place to stop for a bit!
Onwards towards the first tunnel on the Caldeirão Verde

It’s not just the roads and highways that have tunnels. Lots of the hikes actually have tunnels throughout them that go through parts of the mountain. Actually, on Levada 25 Fontes we walked through an 800-meter pitch black tunnel which was pretty crazy!
There’s no 800-meter tunnel to get to Caldeirão Verde but there are a few smaller ones and the first one comes about halfway through the hike. Of course, the day we hiked Caldeirão Verde it had rained a bunch the day before and there was water about ankle deep throughout the whole first tunnel.
Thankfully, we have waterproof hiking boots but lots of other people weren’t as fortunate (or prepared, you pick) as we were. So for your own sake, wear the right footwear and not your favourite white sneakers (they may not look so white after this hike).
As you get closer to this first tunnel you’ll start to see the trail open up a bit and start to see the beautiful mountains all around you. On a nice warm day, the sun will even shine on the trail and you’ll be able to get your tan on while hiking towards the end of the hike.
The last stretch to Caldeirão Verde Waterfall


A few more tunnels will pop up during the second half of the hike. They are quite short, dark, and small so watch your head. Jo actually bashed her head on the roof of one of the tunnels and started bleeding so they’re no joke!
Either a head torch or the flashlight on your phone is good so you can see through the dark tunnels.
Once you get past the tunnels the trail will slowly start to narrow down and this section of the hike can be a little sketchy for anyone a little afraid of heights. Thankfully there’s a railing which helps with feeling at ease but that doesn’t mean there are not some steep drop-offs. So mentally prepare yourself if you don’t like heights!
But it’s all worth it because then you’ll come to the end where you’ll see a bunch of people sitting on rocks on this stream. That’s when you know you’ve made it and Calderirão Verde Waterfall is only 100 meters above the stream.
You’ll be able to hear it before you see it since it’s probably the most powerful waterfall on the island or at least one of them! There are tons of waterfalls in Madeira but this one is an absolute beast.

Once you get to the waterfall, please note that entering is at your own risk! In 2019 there was a landslide that injured 11 people so this part of the trail is not officially open. Since landslides and rockfalls do tend to happen here we don’t want to encourage you to go.
We went and were okay but we also kept in mind that there was a risk with going. At the end of the day, it is your choice.
To continue or to return along the PR9

After you enjoy a break near the waterfall and have a snack or two, you have a big decision to make. You can either turn back since this is the end of the PR9 and head back to the starting point, or continue to Caldeirão do Inferno (currently closed in 2025)!
Once you’ve checked out the waterfall, you can head back and have a coffee and relax at Parque Queimadas, which is the start + finish point of this hike!
Whatever you decide, you won’t be disappointed. Even making it to the end of the PR9 and the famous Caldeirão waterfall is a big hike. You’re gonna love it!
What to bring on the PR9 Levada Caldeirão Verde trail

One of the things to consider when hiking up at this elevation in Madeira is that the weather up here can be totally different from the weather down in Funchal or Ponta Do Sol. Especially when a good portion of this trail is in the shade it can be a little cool at times. So bring a few layers.
Bring some snacks to enjoy at the waterfalls if you feel like taking little breaks at them. There’s a few good spots to relax and enjoy the views along this hike.
Probably the most important thing to consider is either a head torch or a portable charger to make sure your phone doesn’t die and you have enough battery to use it as a flashlight through the dark tunnels.
Packing list for the Caldeirão Verde:
- Water! We always fill up our LifeStraw bottles before hikes and even during them when we can. Make sure to fill it up beforehand
- Sunscreen is highly recommended when hiking in Madeira. Even though it may not seem like you’re exposed to the sun much on these hikes there’s definitely sections where you will be completely exposed to the sun.
- A power bank because you never know when you’re going to run out of battery. Especially with the amount of pictures you’ll be taking and the flashlight you need to use throughout the tunnels.
- A head torch for the tunnels – this might work better than using your phone so if you’re a pro hiker, bring a head torch 😉
- Bring some food! Have a picnic at one of the waterfalls and enjoy the incredible views from the hike. We stopped at the first waterfall and also Caldeirão Verde for a nice lunch break.
- Hiking poles are always nice to have! The incline and decline on most hikes on the island isn’t that crazy but it’s always nice to have a set of hiking poles.
- Hiking shoes are also recommended on this hike. The trail is well maintained but there are stairs, water, dirt, and loose terrain at certain parts so it’s nice to have proper, waterproof hiking shoes for it.
You can check out this great list of hiking gear to get some more inspiration!
Before you hike PR9 Levada Caldeirão Verde

Check the weather
No matter where you hike, you should always check the weather before you go. Madeira has a micro-climate so the weather is always changing and can be very different even a few kilometers away. Checking the weather forecast is the best way to prepare for the hike ahead of you.
Thankfully we had a nice warm and sunny day but only about a 15-minute drive from where we were hiking, there was a ton of snow up in Ribeiro Frio. Caldeirão Verde is a bit lower in elevation but can still get snow in the area. You can see the weather for Parque Queimadas here which is where the hike starts.
As long as it’s not raining too much or too cold the trail should be in great condition.
Pro tip: Before going on a hike in Madeira, always check if the trail is open via Visit Madeira’s website.
Wear hiking shoes
We mentioned the tunnel that had water to our ankles and there are a few other sections where you may sometimes find water on the trail from a small waterfall or from a bunch of rain the day before.
Plan to wear hiking shoes if you have some with you in Madeira. It’s a fairly long hike and even though the trail is well maintained it’s nice to have the proper shoes for the trail.
If you don’t have hiking shoes already, we recommend buying this pair from Columbia. They’re durable and waterproof, and the reviews are great. Check out the reviews here.
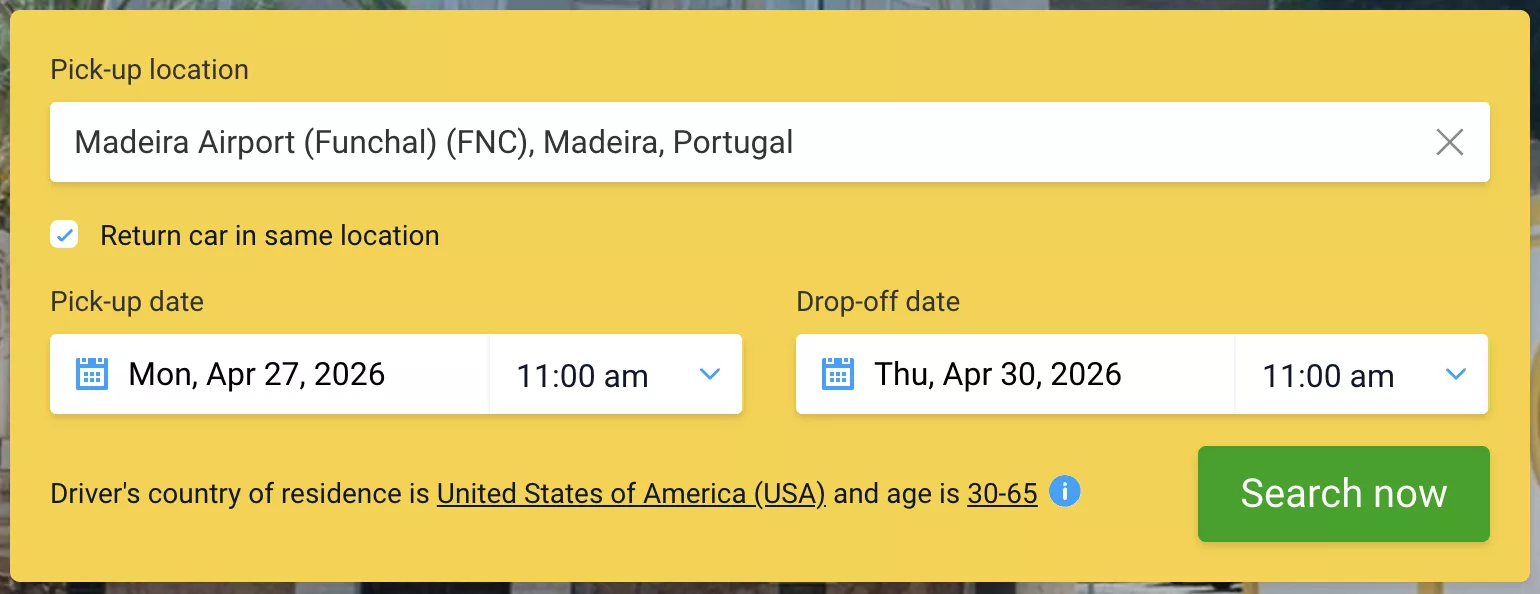
Book your rental car beforehand
Unfortunately, you can’t get to the Levada do Caldeirao Verde parking lot by bus or public transport so renting a car is your best option unless you take a bus to Santana and hitchhike like we did (this takes a very long time though so we recommend renting a car instead).
If you’re staying in Funchal there are quite a few places to rent a car from, but we recommend renting a car from Madeira Airport through Discovercars.
You can find more about what it’s like driving in Madeira here and what you need to know before renting a car in Madeira. Honestly, with all the tunnels that have been built over the years, Madeira is a very safe island to drive around.

Check out some other hikes in the area
If you want a big day of hiking you can even add a few smaller hikes near Santana and Caldeirao Verde to the Agenda. Aguage Waterfall right in Santana is a short 15 minute hike that you can easily add on to this day trip. Especially if you’re staying a few days in the Santana area it adds another exciting thing to see.
Another beautiful and quite hidden waterfall in Madeira is the Cascata Agua D’Alto which is between the starting point of Caldeirão Verde and Santana. It’s slightly longer than the Aguage Waterfall but can also be done in under an hour.
There truly is so much to see in just this area of Madeira it’s incredible!
How to get to Levada do Caldeirão Verde


The Levada do Caldeirão Verde parking lot is the same parking lot as Parque Florestal de Queimadas. There is a €3 fee to park your car there for the day that you have to pay at the office and get a ticket to leave the parking lot.
The best and cheapest way is to just rent a car in Funchal and drive to the parking lot. If you have a car it’s easy to get to the trailhead from anywhere on the island. Be prepared for a nice uphill drive! You’re most likely going to have a Fiat Panda with not too much horsepower so it’s quite an adventure.
Surprisingly we actually didn’t rent a car and took a bus from Funchal to Santana. From there we walked to the main road going up to Parque Forestal de Queimadas and hitchhiked from there. We got picked up right away since everyone on that road is going to the same place.
Going back after the hike, we did the same thing… We hitchhiked to Santana and then took the bus back from Santana to Funchal. So it’s doable this way if you’re up for a bit of an adventure but renting a car is probably your best bet as it’s a lot faster. Especially if there are a few of you, renting a car is a no-brainer.

From Funchal to start of Levada do Calderião Verde trailhead:
- 50-minute drive (45 kilometers)
- You can follow the directions from Funchal to Levada do Caldeirão Verde here.
From Ponta do Sol to Levada do Caldeirão Verde trailhead:
- 1 hour drive (65 kilometers)
- You can follow the directions from Ponta do Sol to Levada do Caldeirão Verde here.
Getting to Caldeirão Verde by public transport and hitchhiking
If you don’t mind hitchhiking then you can easily get there by public transport. If you’re travelling by yourself this is by far the cheapest option. You can take bus 56 from downtown Funchal which takes roughly an hour and will drop you off in downtown Santana.
From downtown Santana, you can walk to Caminho das Queimadas street which is about a 2-3 minute walk from the bus stop. On this road everyone will be going up to the park so basically from here you can start hitchhiking and hopefully someone will pick you up. I think the first or second car that drove past us picked us up. From when they picked us up it was about a 4-5 minute drive to the Parque das Queimadas where the hike starts!
It may sound a little complicated but you basically take the bus to Santana and from there catch a ride to the trailhead and it will cost you about 4€ total each way. So an 8€ day trip!
Go on a guided tour to the PR9
Going on a guided tour is one of the best ways to experience Levada do Caldeirao Verde!
We’ve done two guided tours on the island with Lido Tours and they’ve been exceptional. The first time was on Levada 25 Fontes and then on Pico do Arieiro – and we’ve loved both! The guides are great and we’ve actually met some really nice people on both of the tours as well which is always fun.
For the price (€37.5) and what you get out of it, it’s totally worth it. The convenience of not having to arrange rides for the hike just makes the whole day more enjoyable.
Check their availability here.
Best time to hike Levada do Caldeirão Verde

As long as the weather’s on your side there’s no bad time to hike Caldeirão Verde. Parque das Enqueimadas can get busy but not everyone ends up actually hiking to Verde.
So you hopefully won’t feel crowded on the trail and as long as it’s not raining or hasn’t rained too much in the past few days the trail should be in good condition.
The only thing we’d recommend is to try and start earlier in the day. That way, you can try to avoid the crowds. Especially in the summer months, the parking lot fills up fast (around 8am). Alternatively, you can start the hike later in the day, say 3pm and then you’ll enjoy at least the 2nd half of your hike with fewer people.
You may also like…
- 12 of the Best Hikes to Do in Madeira
- 21 Pebble and Sandy Beaches in Madeira to Visit
- The Best Sunrise Spot in Madeira: Pico Ruivo
- 26 Best Things to Do in Funchal
- Staying at the Amazing Quinta do Furão Hotel in Madeira
Recap of hiking Levada do Caldeirão Verde


Caldeirão Verde is a Levada hike just like many other hikes on the island, but it’s definitely one of the longer and more challenging ones. It’s still not by any means a “hike hike” but it has some distance to it and you really get to see some of Madeira’s best on this trail.
Hiking through the forest, under waterfalls, and in and out of caves this hike really has it all. Caldeirão Verde Waterfall at the end is something out of this world and you’ll really be blown away by this one.
Once you see it all make sure to spend some time in the park where the hike starts. Walk around, check out the Santana Houses, and have a drink at the little shop. This area of Madeira is absolutely stunning.
If you have any questions about the hike leave a comment below or send us a DM on Instagram. You can find us here on Instagram @redwhiteadventures.
Have an amazing hike and enjoy the stunning waterfalls!
Enjoyed this post? Save it for later!


Is this hike available Christmas Day?
Hi Brigitte, This hike is available on any given day. You should be fine to hike it on Christmas Day 🙂
– Jo